***


(NOTE: This project was started back in early 2020 and was finished at some point in 2022. Trying to piece together the process 3 years later has been...interesting. So I apologize in advance if this whole post reads like a fever dream.)
So...
Despite this being my first attempt and more complicated tailoring techniques, I have to say that this project orginally started as a bit of a "throw away".
I really wanted to learn to use The Modern Maker proportional drafting system by Mathew Gnagy and decided to whip up a glorified mockup in scrap fabric (with mostly machine sewing).
Basically, something I could wear but not spend too much time on.
I should have known by now that down and dirty is not how I work!
(Maybe one day I'll reach the point where I only do 2 or 3 mock-ups before cutting my fabric, but that is not this day)
Anyway...
I had some dark mustard/brown/green wool (I still can't figure out what colour it is) left over from my waistcoat project from a few years ago.


I decided to make a high-necked doublet to match, trimmed in the same black worsted wool tape.
Because of the multiple guards on the petticoat, I aim for a slightly later silhouette. But really at this point I was focusing more on getting a handle on the construction and not paying too much attention to any particular decade or style.


The result is a look that I feel is a bit of a hodge-podge and doesn't really resemble any of my inspiration images.


Oh, well! No time two dwell on trivial things like "historical fidelity" and "accuracy". Humbug, I say!! I am sure this will in no way come back to bite me in the ass later!
On to the construction!
Using the proportional bara method outlined 'The Modern Maker Vol.2' (in which a pattern in created using custom tapes) I started on a muslin.
I won't go in depth on how to use this system, mostly because I found I only understood it myself in the doing of it and doubt I could explain it clearly if I tried.
Suffice to say, I highly recommend Mathew's books and accompanying video tutorials in his YouTube page. This method might seem daunting, but I promise Mathew makes it extremely accessible, even to self taught sewists like me. (Really, there's no reason to read past this point. Just go watch the videos!)

Although I wanted to start with a straight front doublet (reasoning the closures would be easier to manage), the rigid 'boob shelf' created by my bodies/stays made that unfeasible, so I opted for a curved front style instead.
I have to say that the first mockup went together surprisingly well!


I suspect my reasoning was that the tabs would cover this.
(Honestly, I was a long time ago and I don't remember why I made most of these choices).


This is repeated on the other front piece and again on the two back pieces.


Final thoughts...

So with that in mind, the the front is shortened, the gap at the bust is closed and tabs are added.
Aesthetically, I have to admit that I'm actually less keen on the tabs, so I definitely plan to return to this pattern and make a bodice with a more dramatic point in the fiture.


Now the fun starts!
I've never tailored anything before, so this was my first time using pad stitching for it's intended purpose. (i.e to help shape and support the garment rather than just as an over-kill basting stitch).
After the body is cut in linen canvas, wool felt is loosely basted in around the shoulders. Then the wool is clipped away from the seam allowances and a series of pad stitches are worked in, first around the arms and then trough the body.
(NOTE: A guide for the seam allowances are stitched in by machine. I don't know if this is the best approach, but I found this material frayed quite readily and so I didn't want to lose track of where my seam allowances should be.)


Then, to provide some stability to front edges, line tape is stitched down just shy of the seam line (to allow for the the front edge to be folded over the tape)


Next, the body fabric is basted into the canvas with large pad stitches. This is not an approach recommended by The Modern Maker, but I've gotten into the habit of doing it to ensure the outer fabric lies flat. It's my security blanket.
Maybe this causes other problems down the road, I'm not sure...

Now the body pieces are assembled with a backstitch, using the seam lines as a guide.
Remember when I said this was a project I wanted to whip together with the machine? Well, that didn't quite work out.
In the end I opt to assemble all the pieces by hand, rather than risk the likelihood of having to tear it all out when the seams inevitably don't quite match up


At this point I decided that I wanted to give a little more heft to the front edge and stitch down a strip of medium weight black linen (the same fabric that I'll later use for the lining)

Since I'm planning to bind the front edge later, the excess brown fabric is then trimmed away.


And as you can see by this point some of the trim has been added to the body pieces.

Next, the shoulder seams are joined and a single line of trim is stitched down along the seam.
(Looking back, I'm a little annoyed by the the fact that I made the choice to have some seams trimmed with a single row and trim and other with a double row...I'm sure I it made some sense at the time, but it sure annoys the heck out of me now).

Now it's time to make up the collar. Like the body pieces, wool padding is basted onto linen canvas. However, this wool is much thinner than the padding in the body since I was worried about the collar being too bulky.
It's then very tightly pad stitched, encouraging the collar to curve outwards, away from the neck.


As you can see, the pad stitching stops quite a bit shy of the front edge. That is because I purposely cut the collar too large, knowing there might be some shrinkage due to the pad stitching. I plan to cut it down later.
The excess wool padding it cut away from the seam allowance on the bottom and the canvas layer is basted to the brown fabric.
Then the collar is attached to the doublet and the excess fabric is clipped away.
(NOTE: Because I plan on binding all the way around the collar I dob't need to leave any of the brown fabric to turn over)

Okay, I hear you ask, what the heck is going on with that loose trim?
Well, I knew I wanted a double row of trim down the front...but since the front edge will be bound I wasn't sure exactly where to place the second row of trim so that it was even spaced. So instead I stitched the trim into the collar seam (roughly where I thought it might line up) and plan to leave it loose until the front edge is bound.
Yes, I know I'm making things WAY too complicated for myself.
Anyway...
Next trim is sewn in around the bottom of the collar.
(At first I made the mistake of sewing this below the seam line on the body, rather than on the collar itself. Don't do that, it sits weird...or at least mine did.)


Now, before the external edge is bound I add the lining to the collar.
(This makes it so that the collar lining can never be removed, which maybe wasn't the best choice...but, hey, you live and learn)

The lining is stitched in with a spaced backstitch along the top edge. Again, this will be bound so I'm not worried about going all the way through to the top fabric.

The the bottom of the lining is turned under and basted into place with temporary stitches along the collar seam.


Then outer fabric along the bottom edge is turned and stitched down, finishing the edge.

Now the front edge can be bound. I'm using 7/8" black worsted wool tape, folded in half and pressed down the middle. This continues all the way around the doublet, including the collar.


With the front edge finished that loose line of trim can now be pinned down and stitched into place.


Okay trim done!


At this point I'm very happy with how well the doublet holds its shape and conforms to the body even without closures.


Now to move on to the tabs and wings, starting with the later.
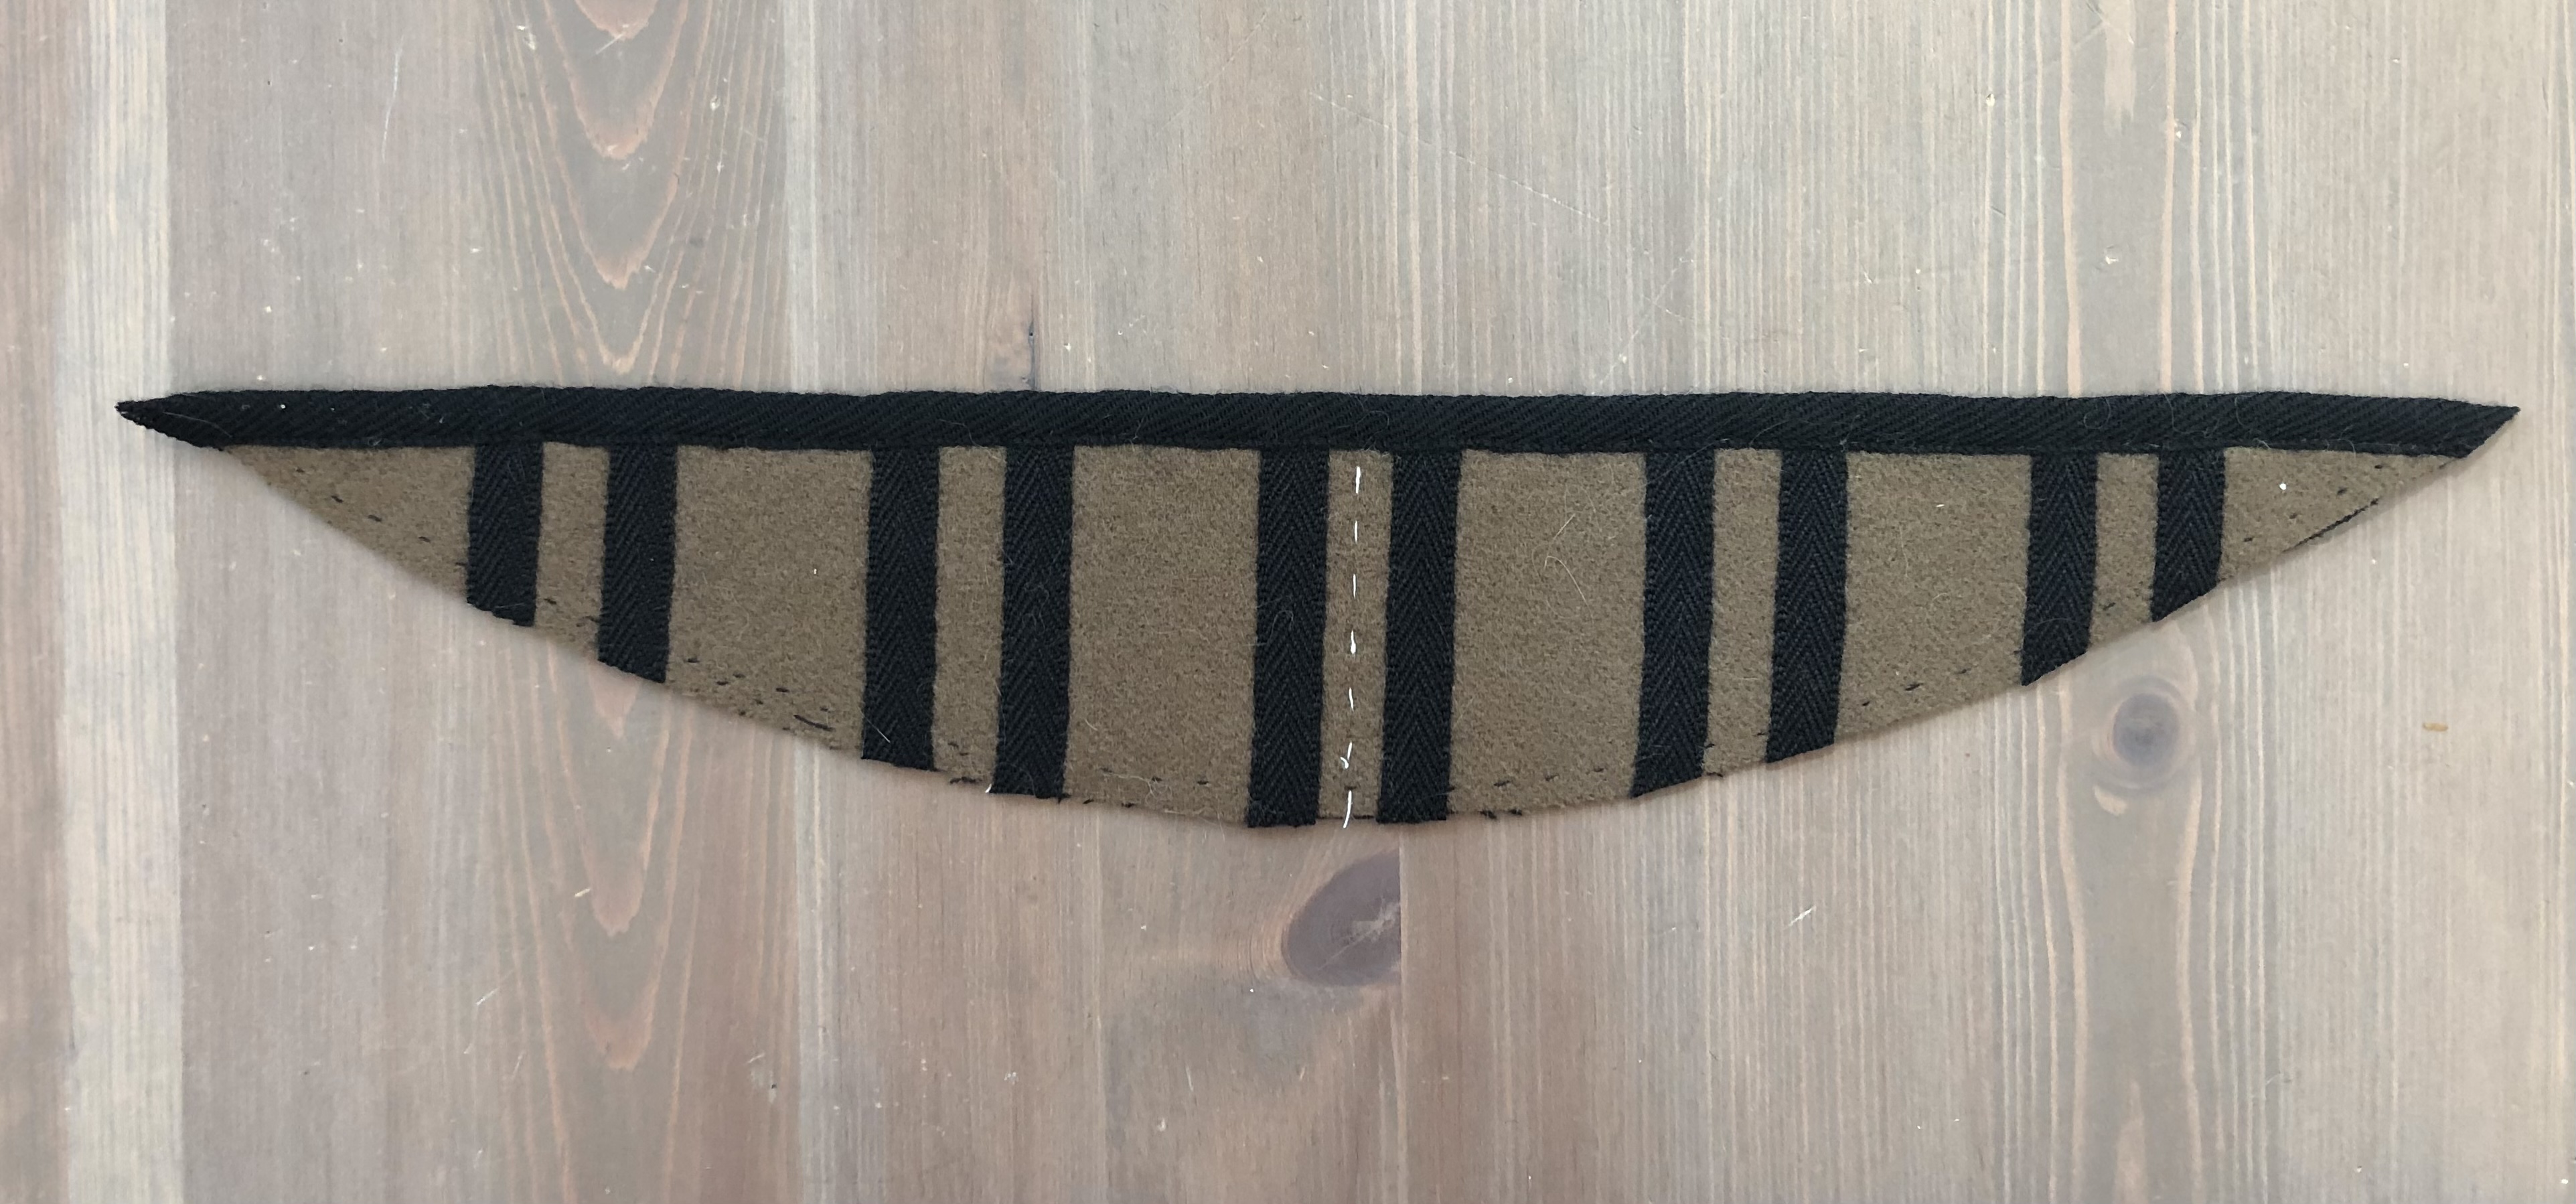
The wings are cut in wool and a quick running stitch is worked down the center fold.

This line of stitching is used as a guide to place the trim.
(NOTE: I didn't document this earlier step, but the wing have also been basted to the black linen lining, as indicated by the row of black stitches running around the edge)


Then the excess wool tape is trimmed away at the outer edge bound in same 7/8" tape used for the doublet.


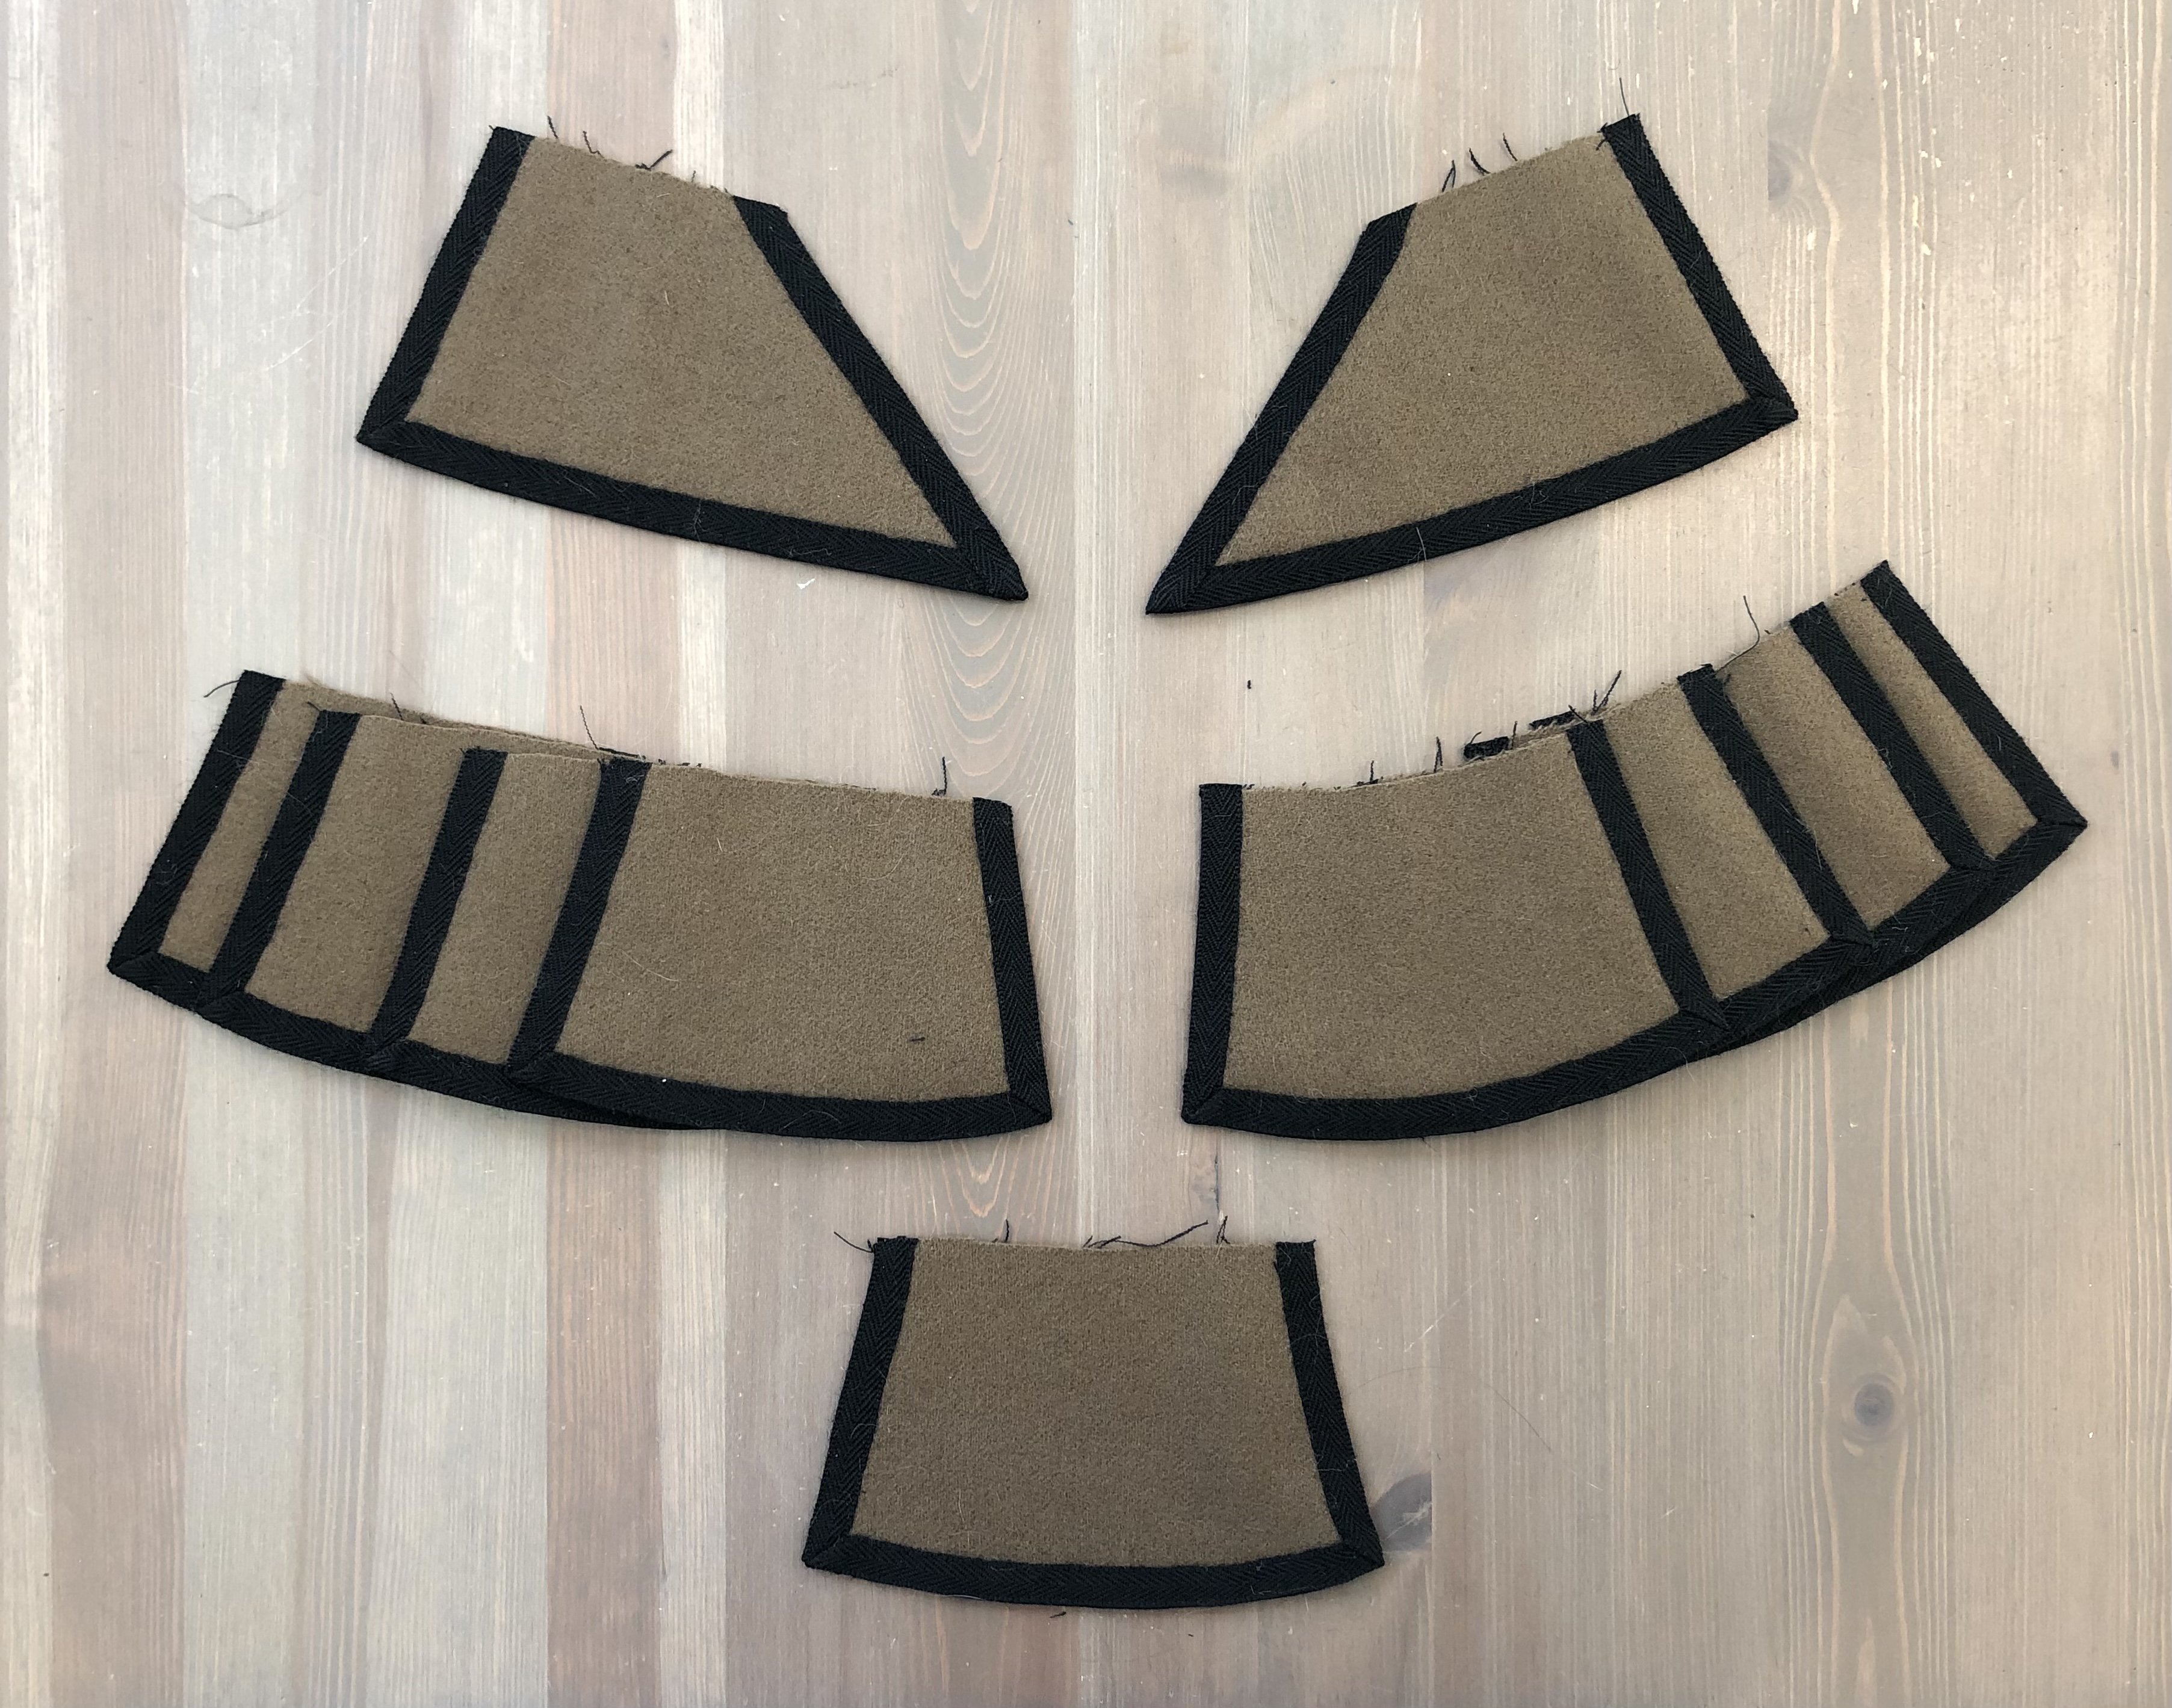
Next up: the tabs.
Like the shoulder wings, the tabs don't have any canvas interlining and consist only of the brown wool and black linen lining.
I choose not to line these in the traditional way since the two front tabs had rather extreme points that I knew would be difficult to work around. So instead I tried something a little different.
First, the wool is basted to the black linen lining with large, loose pad stitches. The lining is cut with an extra 3/8" seam allowance along all edges (expect for the top).
Then the tab is placed over knee/thigh to form a natural curve (lining side down) and the wool is stitched to the lining along the outer edges.

Then the bottom edge is folded over and stitched own the wool on the right side.

This is repeated on the two side edges.


Then the worsted wool trim is stitched down, covering the raw edges of the linen.


This is repeated for all the tabs.
I had originally intended to have a double row of trim on the tabs (as seen in my earlier sketch) but by this point COVID had hit. Supply chains had started to become disrupted and I wasn't able to get any more narrow worsted wool trim.
I had to make do with what was in my stash and I knew I didn't have enough to do another row of trim on the tabs and finish the sleeves...so single row it is!
Next the finished tabs are basted to the doublet with temporary stitches to check the placement.


I try the doublet on and it's at this point that I realize I've made a mistake.
I had started with quite long tabs in my mockup, but thought they were pushing a bit too far into the 17thC and so cut them down (you can see the two sizes in my mockup photos at the start of this post).
But when I went to make up the final tabs I'd clearly gotten my pattern pieces mixed up and cut the larger size!
As mentioned above, I definitely didn't have enough black trim to remake them and didn't really have the heart to tear them apart and try to salvage the trim that I had.
Also, at this point I really didn't have the energy to really care (again...COVID).
So the weirdly big tabs stayed.


Moving on to the sleeve!
A quick aside...
Clearly, I'd lost some momentum at this point because the photo documentation starts to get pretty thin from here on out. (And without the images for reference, trying to remember what I did 2+ years ago is getting trickier!)
Anyway, the sleeves are first joined along the back seam (after marking the shoulder and armpit in thread). Then the black trim is stitched down along the finished seam. It's easier to apply the trim flat, which I prefer to do along the back seam.
Then the front seam is closed and the trim added.


Next, the sleeve is sewn into the armscye.

The doublet is tried on one more time to check the sleeve length.
(Also, look how well that collar is popping because of the pad stitching!)


With the length adjusted, the sleeves are finished at the wrist and the lining sewn down.

Finally, it's time to line the body of the doublet.
First the lining is stitched down around the armscye and at the collar.


Then the lining is pinned into place along the front and bottom edges before being finished with a fell stitch.


With the doublet lined and finished the front closures can now be added.
But I don't...
...for nearly a year.
In fact I don't have any other construction photos past this point.
I wasn't able to source the heavy duty hook and eye tape I'd come to like, and by now lock-down stress and snacking meant that the doublet no longer fit me anyway.
So it wallowed on the unfinished project pile for some time.
Eventually the hook and eye tape came back into stock and I was able to finish it off.
I don't have any photos of the process, but here are the rough steps...
The hook and eye tape was sewn in several passes:
1) The front edge is worked with a fell stitch
2) A spaced backstitch secures the tape, catching as much as the interlining as possible (without breaking through to the body fabric). This pass also secures the hooks and eyes themselves more securely into place to prevent gapping.
3) Another row on spaced backstitches is run right under the hooks and eyes.
4) A last row of fell stitches connects the edge of the tape to the lining.
(NOTE: These images do not show the doublet, but an older back fitted gown I made --but have yet to photograph-- using the same technique)


It might seem like overkill (and probably is) but I find this really keeps the hooks and eyes from flapping open and therefore significantly reduces gapping along the front edge.

And SOMEHOW the doublet fits.
Barely, but it fits...
It then it sat in the closet for nearly another year as I put off photographing it.
One of the reasons in that I debated the over stying for quite a while. I couldn't settle on the right accessories because I found the whole look changed considerably based on what it was paired with (with some accessories pushing it well into the 1620s or 30s).
In the end I settled on simple a ruff, cuffs and coif.
The ruff is the first one I made back in the day. It's 3.25" wide and has been reset with slightly smaller, 2" wide sets.

Pictured with my small 1.5" ruff
The cuffs are simple linen bands, pleated and sewn to a wrist band.
The pleats are folded but not stitched down. This creates a softer look and I believe this style is called a "tulip cuff"...but I know can't find where I read that, so maybe I made it up. I wouldn't put is past me...


The cap is the one I made for my Trevelyon gown, and as also worn over a close fitted coif.
Again, the front edge is lightly starched and then shaped and pinned in to place.


For the final fitting I also switched to my new, lower cut pair o' bodies. Even though the doublet was fit over my old black bodies, I find I was getting a visible harsh line at the bust and wanted to try and minimize that in the final look.


Okay...
That's it. I've procrastinated long enough. On to the photos!


So that's it!
The doublet is done. Finally.
I actually like the finished look a lot more than I thought I would.
I admit that I'm still a little self conscious about some lingering COVID weight gain, which was one of the reasons I put off photographing this for so long. As a result the proportions are not everything I would wish.
But...
There are some things I really like.
The back is probably my favourite and I think the trim worked out beautifully...even if I do want to go back in and add a second row of trim to the tabs.
And as I hinted earlier, one thing it really lends itself well to is restyling. So look for another post soon with a ton of new accessories. (Including hats! SOoooooo many hats...)
EDIT: And HERE it is!
***
Resources & Materials
Pattern:
Fabric:
-"Dirty Beige" wool suiting from Mood Fabrics
-White linen (2.8oz) from WM Booth Draper
-Black "Judy" linen (5.5 oz) from Gray Line Linen
-Coffee "Warsa" linen canvas (7.5 oz) from Gray Line Linen
Trim and Notions:
-Back Worsted Wool tape from WM Booth Draper
Thread:
-Black silk thread
-Beige/brown silk thread
-White cotton thread (silk finish)
-White linen thread