My first foray into early period!
While my heart still belongs to the insanity of the 1590s and beyond, I have to say that I have a soft spot for the simpler, elegant lines of the early 16th c. silhouette.
It's just so darn pretty!
Having said that, it should come as no surprise that this outfit (as usual) began life as something else.
I'd long been planning on making an early-period kirtle inspired by one found in the 1545 Hampton Court painting of The Field of the Cloth of Gold, 1520 (lower right hand corner).
I had plenty of red wool left over from my petticoat bodies and always intended to make a kirtle out of it. This seemed like the perfect opportunity!
I already had a black apron and partlet, so all I needed was to a half-yard of yellow wool for half-sleeves and I could whip out a fast, easy, summer project! No problem!
Well, famous last words...as usual.
Right out of the gate I struggled with a mockup.
I decided to try a pattern from 'The Queen's Servants' (by The Tudor Tailor), but I ended up falling in between two sizes and really wrestled to get a fit I liked.
To be fair, this isn't the fault of the pattern. I become oddly obsessed with folds under the arm, which in all honestly likely would have resolved themselves in the final garment.
But I COULD. NOT. LET. IT. GO.
After MONTHS of going in circles and countless mockups I finally thought, "This is ridiculous. You have bodice pattern that fits. You've made it three times before. You know it works, for the love of god, stop this insanity and just use that."
So I did.
But I had to tweak it.
The bodice in question is the same pattern I've been using since my blue Trevelyon gown (check out that post of you want a step by step construction of the original bodice).
However, this doesn't shape really work for early period. It's too long in the torso and has a fairly long front point.
The sides will need to be shortened and the point removed.
Also, the neckline should be lower and and a tad wider.
Finally, the side-back seams pose a bit of a problem. As you can see, the bodice has a fairly narrow back piece...
...however, I want to add additional seams to mimic the look of gowns seen in Bruegel paintings.
(It's not strictly necessary, but my thinking is that I can use this project as a quasi-mockup in preparation for a Bruegel inspired outfit down the road).
Adding additional back seams to the current pattern would look cramped and odd. This means the side-back seam needs to be moved to under the arm to make room.
Also, I decide to add a 'V' to the back to further mimic the look of the Bruegel paintings.
Old back on the left, new 2-piece back on the right
The final pattern is adjusted...
...And mocked up!
The shape is pretty good, but can you spot the elephant in the room?
Yes...
I went back to boning. (For EARLY PERIOD! Shock! Horror! Hiss!!!)
I know. But at this point I just wanted it done. I can't help myself. This 'summer' project had now been going for the better part of 5 months (and counting) and I wasn't even out of the mockup phase!
Boning is my security blanket.
However, I do only use it along the lacing edge along with one synthetic whalebone at the side. It's still wrong...but slightly less wrong? Maybe???
ANYWAY...
With the pattern more or less working it's time to start on the foundation layers.
As usual this is made up of two layers of 10.5oz cotton hemp, pad-stitched together and with additional channels sewn in for support.
Now, at this point you're probably wondering where those additional back pieces are?
Well observed.
But we'll come to that in a moment...because this is the point where the whole project starts to go off the rails.
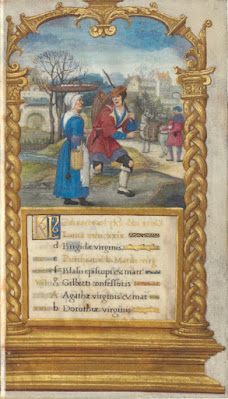
On the verge of cutting the red wool, I stumble upon this image and can't get it out of my head.
It's from a book of hours once owned by Catherine de Medici and probably dates to the first half of the 16th c. (roughly 1500-1530)
The next thing I know, blue kirtles are popping up everywhere!
Maybe it's because it's the shiny new thing. Maybe it's because everyone has red kirtles...but I was suddenly gripped with the need to make this kirtle BLUE.
It was also at this point that I realize I'd made a slight mistake in my mockup and foundation layers. I'd made the front close edge to edge, but my inspiration from the Field of Cloth if Gold painting has gap of at least 1.5" which I wanted to honour.
Unstitching the channels in the foundation layers to fold back the front edge further and increase the gap would have been possible, but it also would have been a massive pain.
That clinched it. I'd do a last minute pivot for this project and save the red wool for a later date.
It certainly helped that I'd already found some beautiful blue and violet wool from Dorr Mill fabrics.
Okay! So back to the foundation layers...
I had wanted to keep the multiple back seams in the final look, but realized that that would get very bulky considering the weight of my foundation layers.
So instead I decided to cut the back as a single piece for the internal layers, and then stitch the two back pieces in wool on top of that.
Yes, the boning is horribly obvious here.
Thankfully it's a lot more subtle when worn.
Yes, it's a totally theatrical cheat.
I'm not totally in love with the outline of the seam allowance that is visible with the back is pressed...but oh well, that's what I get for cheating.
(Thankfully this looks way worse pressed flat than it ultimately will on the body.)
The bodice pieces are then joined together and the seam alliances stitched down.
It’s then lined in blue linen and the front edges are worked with eyelets (offset for spiral lacing)
Next it's time to make up the skirt.
For this I returned to 'The Queen's Servants' and used one of the patterns from their gowns rather that the kirtle. I wanted a shaped skirt, but also one that has enough volume in the back to pleat (as seen in my inspiration image).
The required quite a lot of piecing, which I had never done in a skirt before but rather liked.
In the end the skirt ended up being a tad too voluminous for a lower-class kirtle...but it sure is pretty!
The skirt is then shorted by turning under a wide band and hemmed.
Finally, short sleeves are lined, finished on all sides and whip-stitched into the finished armscye.
(The sleeve pattern is adapted from the gown pattern in The Queen's Servants)
Kirtle done!
Next it's time for the accessories!
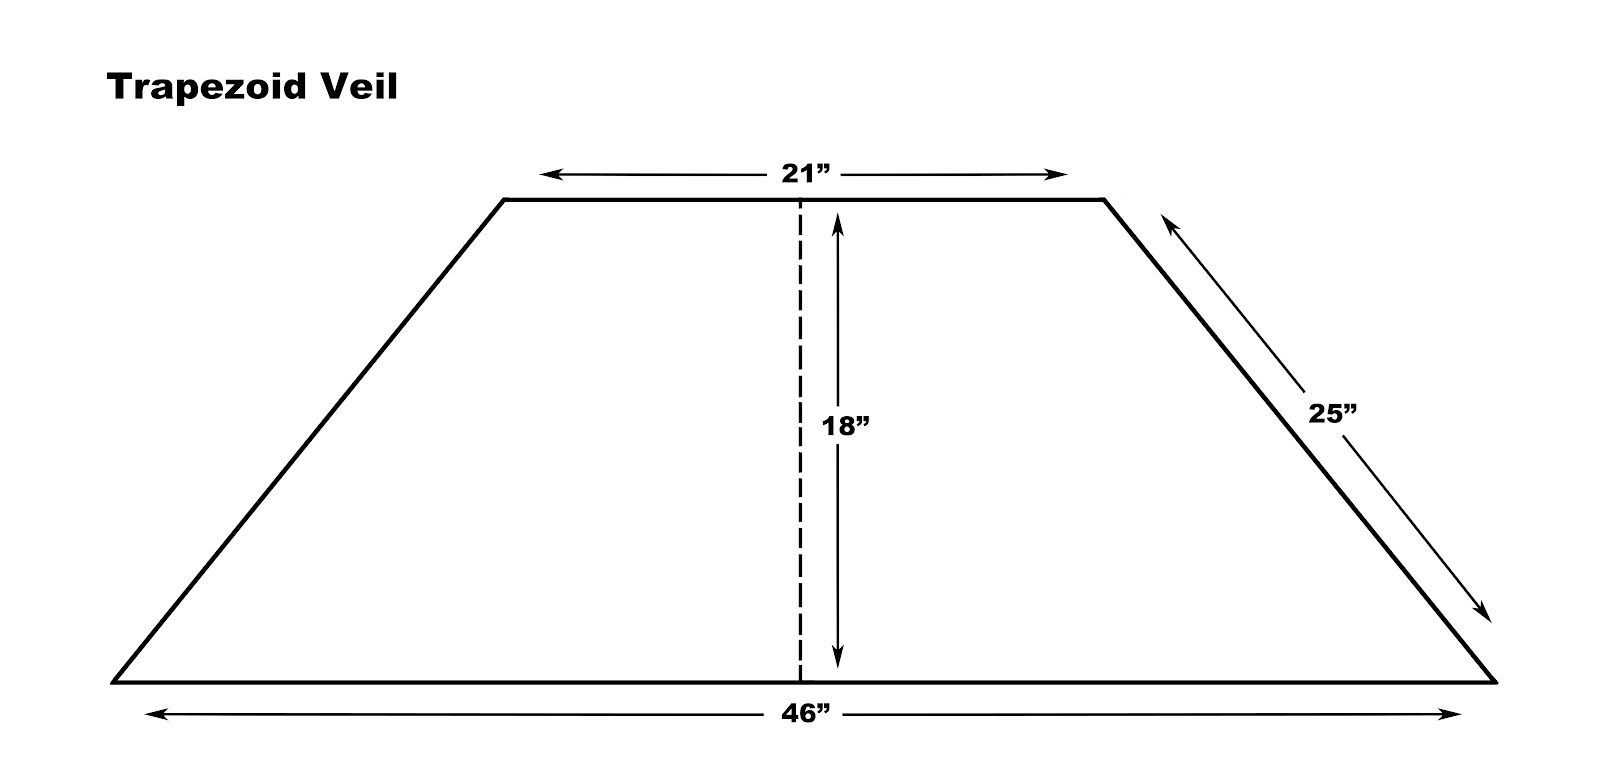
For the linen head wrap I used the white trapezoidal veil I recently finished for my linen veil experiment.
Then I need a new apron. I already have plenty of white aprons of various widths and lengths, but all are gathered at the waist.
So I quickly whip up and un-gathered apron. It's just a large rectangle, approximately 26.6x37", hemmed on all sides and whipstitched to a matching waist band along the top edge (leaving the sides free).
Next, the wool sleeves.
The pattern is basically a simple wool tube, tapered to the wrists.
The sleeves a made of wool and lined in linen.
Bur then at the last minute I decided the purple was a little too warm (based on the inspiration image), so I swapped it out for a more thistle shade.
Lastly, the shoulder linen.
This ends up being tricker than I thought.
Originally I figured it was just a square cloth folded into a triangle and worn around the shoulders (sort of like a later fichu) but had a difficult time finding any other examples of that style this early...though it's a very common look into the next century.
There are lots of linen squares worn around the shoulders, but not triangles.
Conversely, there are a lots of pictorial evidence of pointed black partlets, but not white ones...
...or, again, at least not this early.
I can find plenty of later, Italian examples but (so far) nothing for Northern Europe at this time.
And of course there is always the possibility that this is just a very low cut, back, as some images seem to suggest.
But the (albeit vague) gathers and folds around the neck make make think that's not the case. This also suggests something wrapped around the shoulders that doesn't have a rounded/cut to fit neck.
There are examples of white partlets with similar folds, but annoyingly the back is not visible.
The only thing that comes close is this image, "Danse des Paysans", by Nicolas Baullery (1560-1630), which appears to be be mid-16th c. but (as is evidenced by his dates) is a later pastiche in the same style as Bruegel.
It's not as early as I would like, but it does at least purport to represent an earlier style and seems to show a triangular shoulder linen. It's sheer enough to see that it is being worn OVER a white linen, square partlet, which also suggests it is cut to shape and is not a folded square.
On the other hand, this look (with a sort of tassel or something hanging off the point) does definitely seems to be a later style, though these mostly appear to be folded squares.
Backing up again...
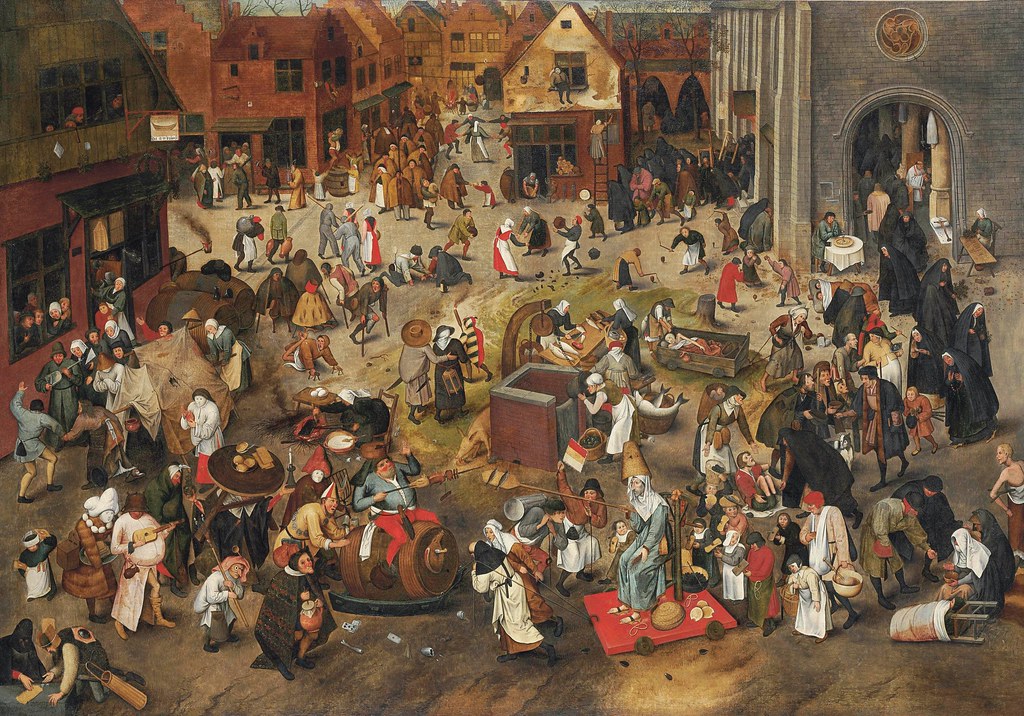
There do seem to be triangular shoulder linens in earlier paintings, but they always seem to be part of a larger head covering.
"Battle of Carnival and Lent" by Breughel the Younger (1564-1638),
Based on the 1559 painting by Bruegel the Elder
This one is 24" square.
(Note: I don't know that I'm loving the shoulder linen. Something about it looks sort of wrong. But, oh well! Something to fix for next time!)
Final thoughts...
I really like the overall silhouette and feel of this outfit.
I'm obsessed with the wool and think it's the perfect weight and drape for the skirt.
I'm still a little annoyed that I continue to fall back on boning, especially when it's completely inappropriate, but I keep on liking the results...which I guess is why I still think of these as costumes and not clothes.
(which is okay)
I can definitely see myself coming back to this period.
In fact, since I've already started on a second version of this kirtle in red, I can pretty much guarantee it...
***
Resources & Materials
Pattern:
-The Tudor Tailor (book and/or ready-made pattern...but really, the bodice is mostly self drafted at this point)
-The Queen's Servants (book and/or ready-made pattern)
Fabric:
-Blue wool from Dorr Mill
-Purple wool from Dorr Mill
-Blue "Judy" linen (5.5oz) Gray Line Linen
-Natural "Judy" linen (5.5oz) Gray Line Linen
-White linen (2.8oz) from WM Booth Draper
-Hemp/cotton muslin for interlining (10.5) from Hemp Traders
-Muslin for mockup (also from Hemp Traders, but any muslin should do)
Trim and Notions:
-Linen tape (1/4") for lacing from WM Booth Draper
Thread:
-Blue silk thread
-Purple silk thread
-White cotton thread (silk finish) for linens
Boning:
-7mm Plastic coated spring steel bones (4) from Vena Cava Design
-7mm Synthetic whalebone also from Vena Cava Design
Other Supplies:
-Swedish pattern paper from Amazon. (This stuff is great! You can iron it!)
-Pattern weights


No comments:
Post a Comment