***


I'm still working through the backlog of pieces that I completed during lockdown but never got around to photographing. Next up: A 1590s loose gown.
I realize that it's getting a bit cliche to describe every new outfit as having been "on the go for a while" but man...this one has REALLY been on the go for a while.
Looking back at my old posts, I've been planning and working on this project for at least the last 10 years.
So let's back up a bit...

Some time in the early 2010s I fell in love with a short-lived, but very specific style from the 1590s, epitomized by the portrait of John Dunch and his Nurse, Elizabeth Fields (above).
Elizabeth's outfit consists of a black, loose gown (with what appears to be wide, black velvet revers); a large black hat; a large white ruff; and a white (pleated?) linen stomacher of some kind.
This look is not often seen in portraits, but appears very frequently in tomb brasses from the 1590s.


Wife of Arthur Pennyng, 1593


Unknown Lady, 1590


Margeri Browne, 1594
And less frequently, in miniatures:


Two Unknown Ladies, 1590s
And even in an allegorical painting:


Detail: A Party in the Open Air (Allegory on Conjugal Love) 1590-95
Most of the pieces seemed relatively straightforward, but the defining feature of this style -- the white "pigeon breast" -- really had me flummoxed.
I won't rehash my whole research process again (those inclined can find my increasingly unhinged ramblings HERE).
But the long and short of it was...I had no idea.
However, for the sake of this project I decided that some sort of dickey would be the most practical solution. (Based on a Regency chemisette)


This is, incidentally, virtually the same approach that would be later hypothesized by the Tudor Tailor in "The Typical Tudor" in 2022 (pg.184). I guess great minds think alike...or in my case, addled minds.
(A video of their take on the same outfit can be found HERE.)
Okay. Cards on the table.
I have to begrudgingly admit that I was childishly annoyed that they had beaten me to the punch in "The Typical Tudor".
Yes, it's immature and stupid...but at this point I was feeling very protective of this strange little style that I'd been nursing for nearly decade and didn't want to appear to be jumping on the bandwagon of their (frustratingly fantastic and beautiful) reproduction, especially since by then I had virtually all the pieces completed.
There. I said it. I'm a giant baby.
ANYWAY...!
With that off my chest...let's soldier on, shall we?
Unsurprisingly, this being a 10 year process, I've lost (or can no longer make sense of) most of the photos I took along the way.
Regardless, let's begin way back in the mists of time with the mockup.

(More photos of the mock up process can be found HERE:)
The pattern is based on the Loose Gown with Revers from the original Tudor Tailor (pg. 76-77), with the large sleeves from the Late Period Gown (pg. 129)
As you can see above, I really struggled to get the collar to lay properly...and though I eventually altered the pattern to fit, I cannot for the life of me remember how (and a photos are lost on a memory card somewhere).
I believe this issue has ben resolved with an updated version of this gown in The Typical Tudor (pg. 159).

Per the pattern, the sleeves will have two bones worked into the lining for support.
(Note: I had clearly scrapped this mockup by the time it came to hemming the gown --8 years later--because this is a much more attractive length than the final version).
Next the body of the gown is cut and made up.
(I ended up kicking myself slightly for choosing this cutting layout. Although it was a more efficient use of fabric it resulted in a very obviously different fabric nap for the front and back pieces, which is very noticeable in direct light)

The velvet revers are attached the the lining. I didn't want to turn the velvet on the inside edge (because it would end up being bulky) so instead I bound the raw edge in a narrow silk ribbon and stitched it to the lining by hand.


The gown and lining are then made up in a way so that the armsyce is finished completely. The sleeves will be whipstitched on later.
(Apologies, I could find absolutely no photos of this process)

(slightly ridiculous photo of gown --worn sleeveless-- over a black shirt)
Next, the sleeves are made up.
First, an additional upper sleeve is made out of linen, on which I plan to sew the boning channels.
My reasoning is that the extra layer will both give a tad more support and also (hopefully) keep the bones from being super noticeable from the outside.
First, the lines for the bones are cut into the pattern with an exacto-knife, and the pattern placed over the cut piece...

....and then traced in chalk.
(Kitty provides additional support.)

(...But only up to a point.)

With the boning lines marked, two strips of worsted wool tape are pinned down...


.... and stitched into place along the outside edges.

Then the support layer is pinned to the sleeve lining and sewn down.

Synthetic whalebone is then cut to size and filled down, to keep the ends from poking through the fabric later.
(NOTE: Please wear a mask while filling. You don't want to inhale any mico-plastic dust)

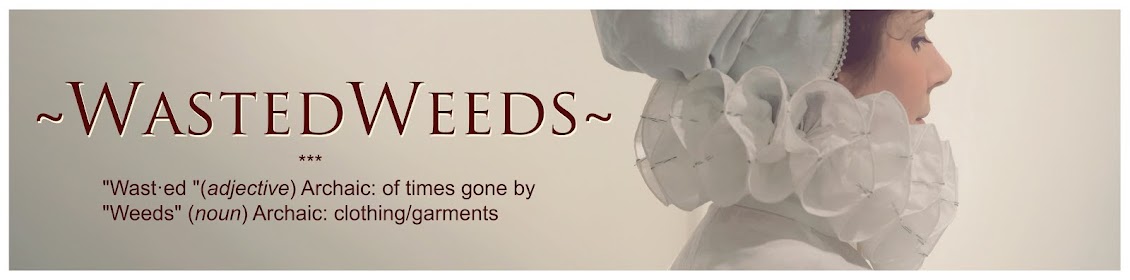
The whalebone is inserted into the channels and the sleeves sewn together. Then the sleeve is turned, leaving a finished edge around the top of the sleeve.


The top of the finished sleeve edge is cartridge pleated and then the whole sleeve whipstitched to the finished armscye (note: a white thread line indicates the shoulder point on the sleeve).


Even with the boning, I still feel like I need additional sleeve support, so I decide to experiment with an internal shoulder roll.
The pattern in pulled from the Doublet Bodice in "The Tudor Tailor" (pg. 83)
The roll is stuffed with strips of cotton wadding and stitched closed.


Then the roll is whip stitched to the inside of the sleeve, catching the outer edge of the cartridge pleats at wide intervals.

A comparison with and without the roll certainly shows a difference. So rolls it is!


However, the bones are also looking very noticeable, so I decide to remove the lower one.


Finally the sleeve cuffs are finished and the gown is hemmed (In this case, bound with wool tape).


With the gown done it's time to move on to the accessories.
Now, despite the fact that I had originally settled on a gathered dickey/chemisette, I decide to experiment with pleats instead.
It's sometimes hard to tell with 16th.c English portraiture what is stylized and what is meant to be a literal representation, but to me there seemed to be a definite difference in contemporary images between unstructured gathers...
...and more regular, vertical pleats.
I might have chalked it up to artistic choice in the Dunch portrait, except that this portrait and subsequent tomb monument of Elizabeth Cooke, Lady Russel (died1609) seemed to show something similar


So I whip up a linen test-square with knife pleats, sewn to a linen base.

And then steamed the pleats a bit with the iron to encourage them to floof up a bit.

Happy with the results, a pleated dickey is made up.
The front in made up of two pieces (I had originally contemplated a front opening) with the peats running towards the center.
The back pieces intended to tie under the bust and the excess font length can be tucked under a petticoat or bodice point or folded and pinned into a 'V'.


Other accessories include a black linen petticoat (I really need a wool one, but this will do in the meantime).

My linen pair o'bodies.


A large linen ruff; 4.25" wide set with 2" sets (made with 2.8oz linen).


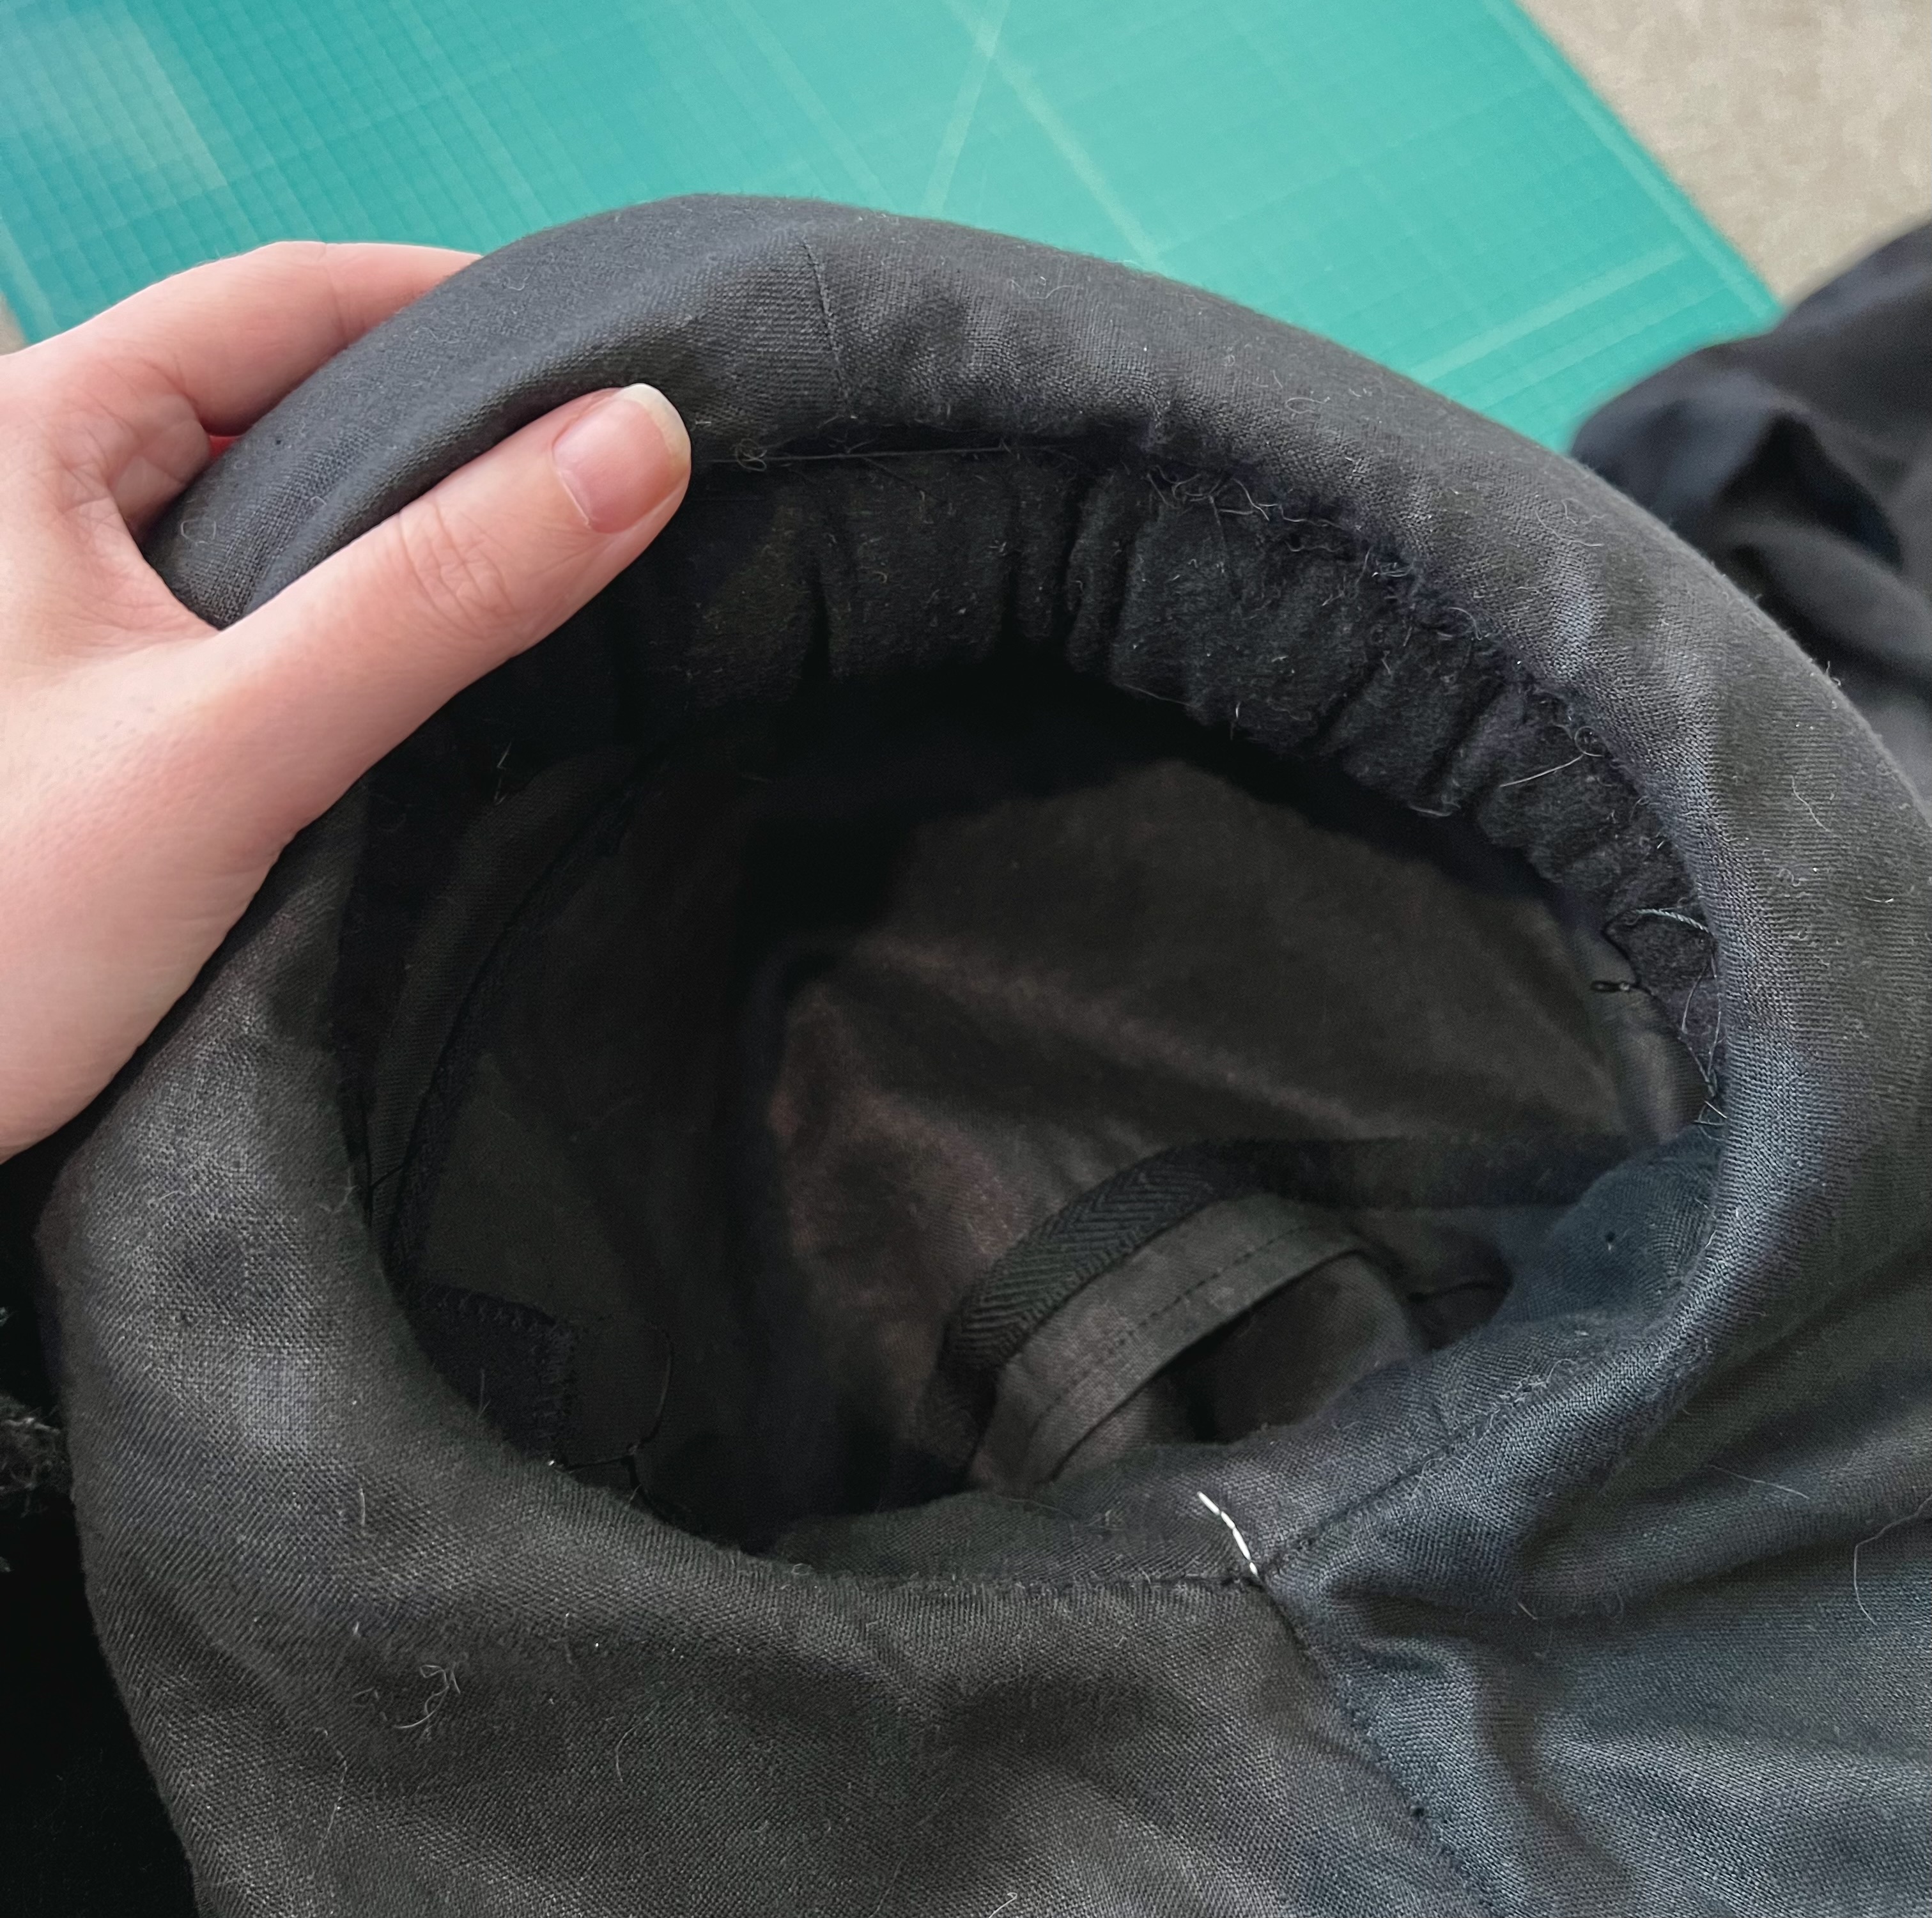
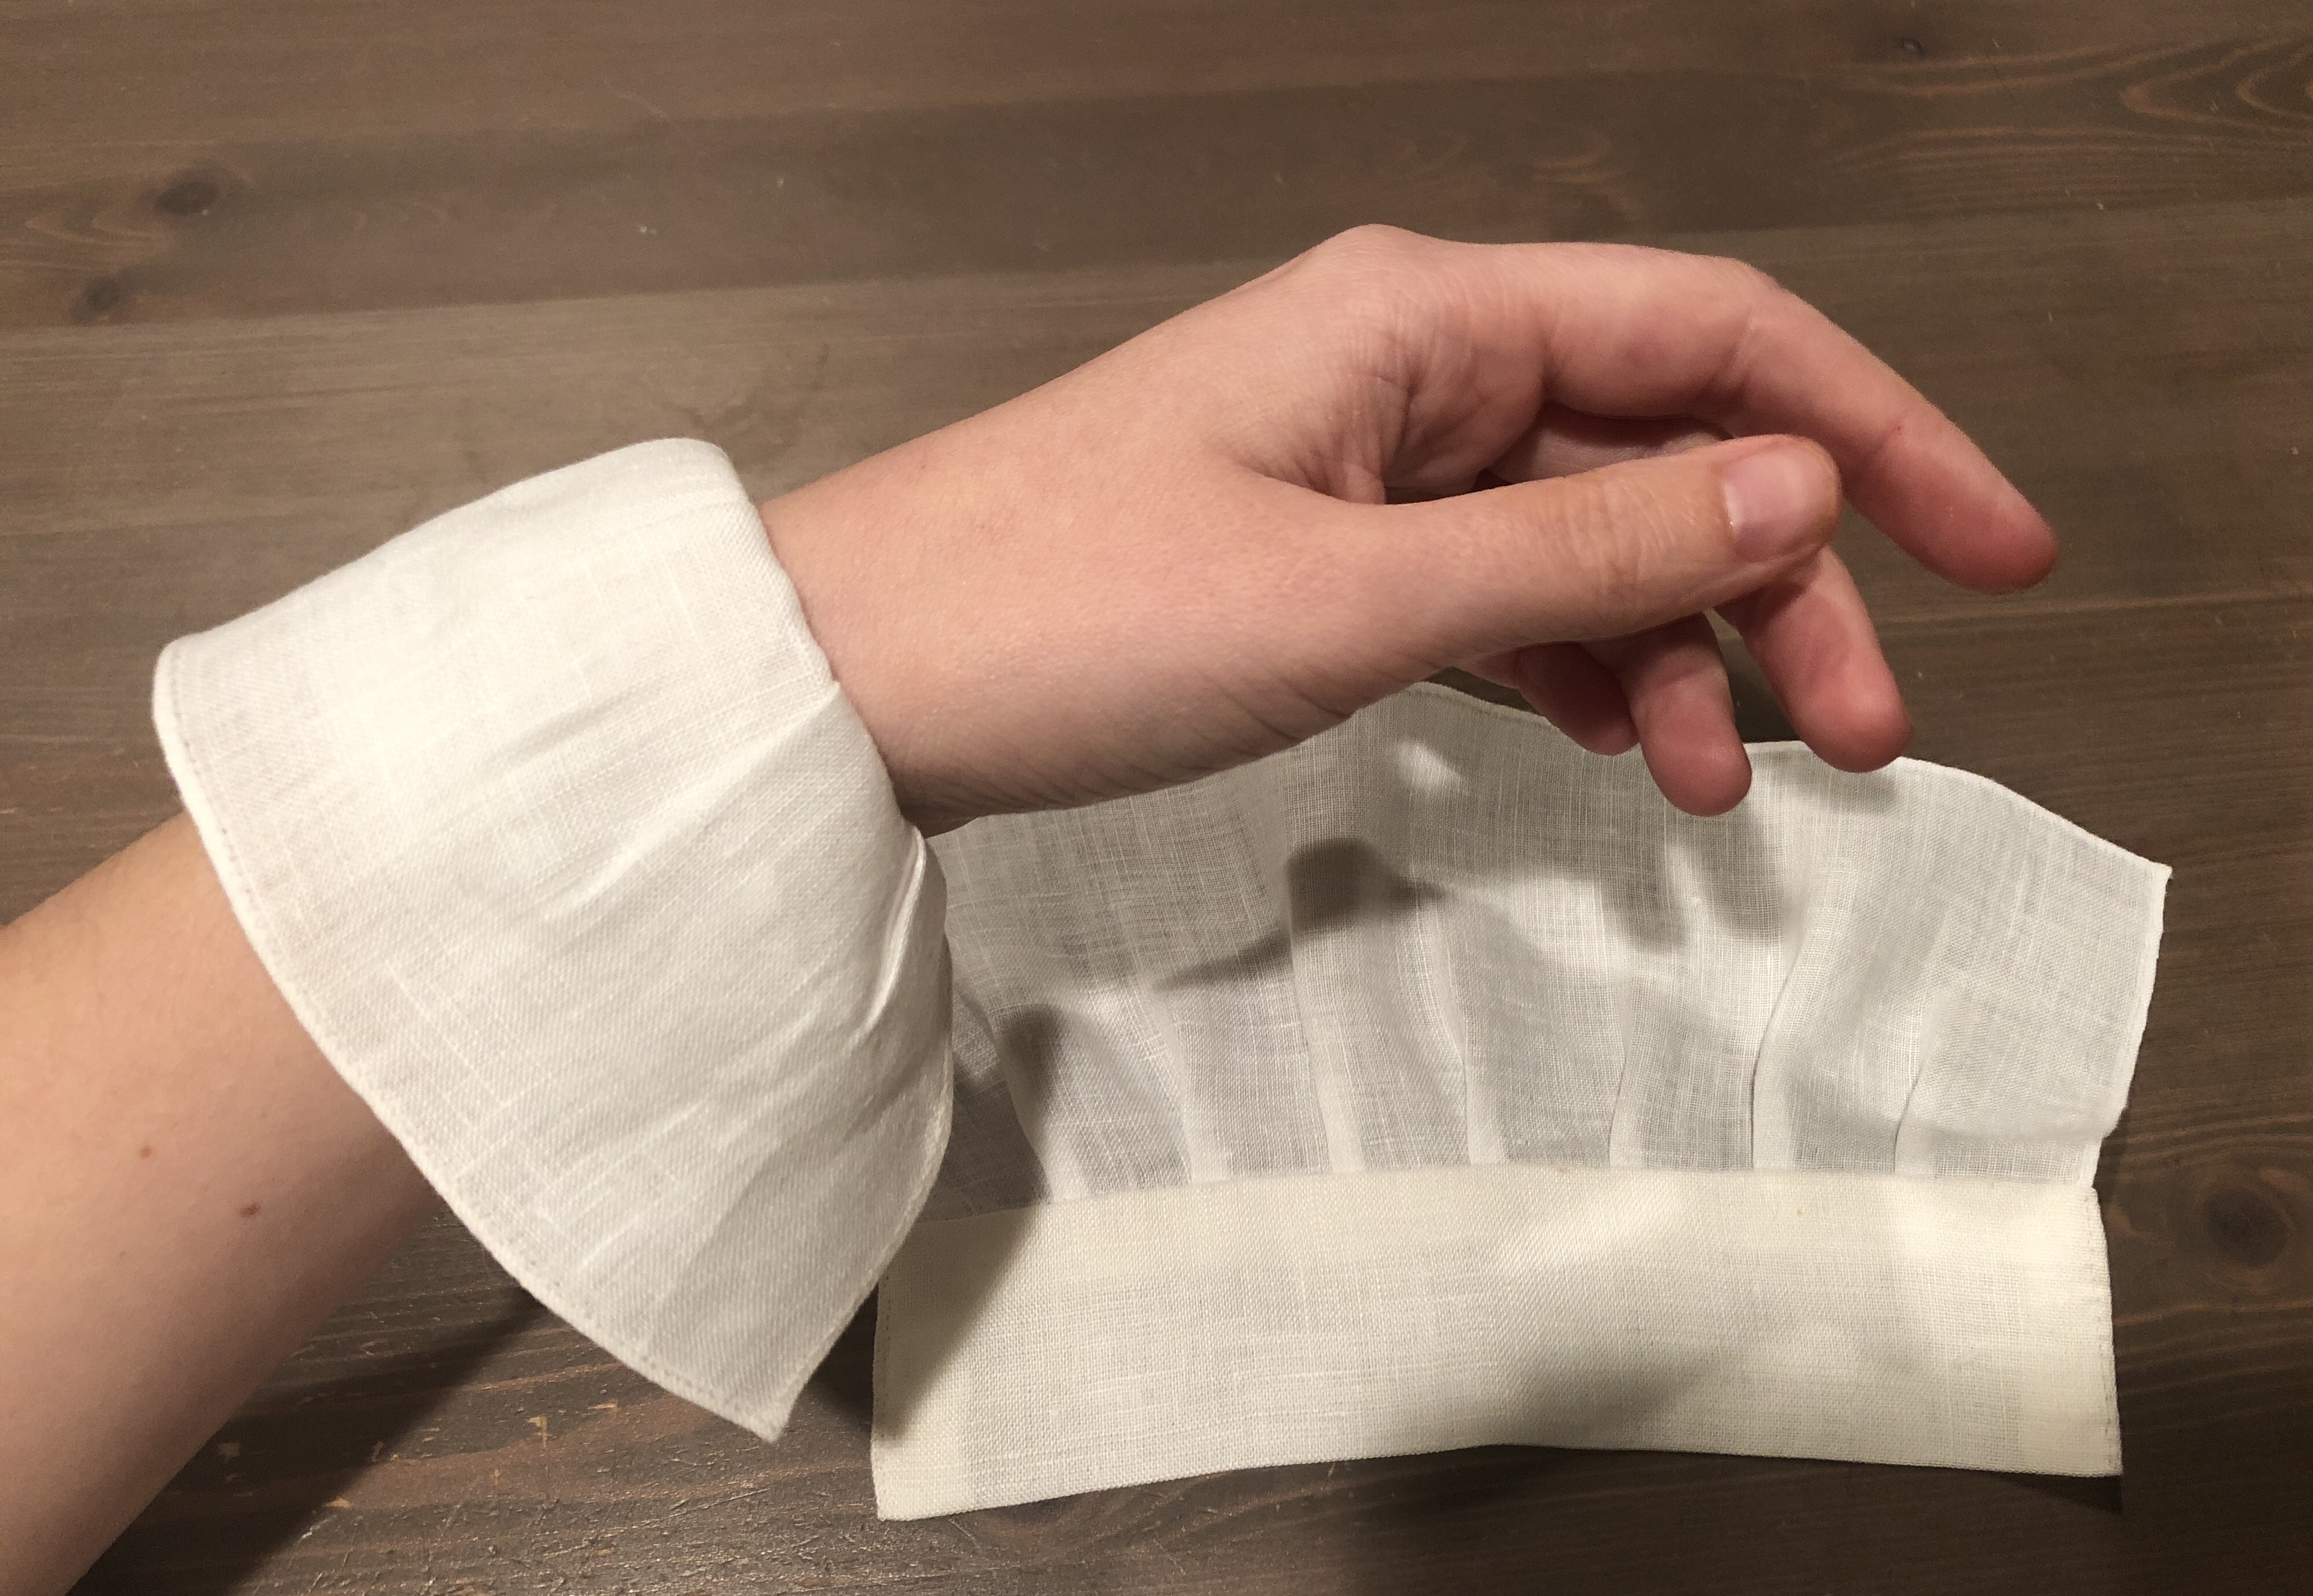
A pair of linen cuffs.

My trusty white coif with tiny lace trim.

A black silk sash/belt.

And a pleated white linen apron. It's a large linen rectangle, aprox 39x30", pleated down to 9" at the waist.


Finally, the big one…A GIANT-ASS HAT!!!!
Surprisingly, this ended up being most difficult piece to source.
I ended up commissioning a few hats from excellent milliners, and while they were absolutely stunning they didn't quite fit proportionally with the silhouette I was trying to recreate.
However they will be prefect for some other projects that have been on my "To-Do" list for a while.
*cough* Ester Inglis* cough*.

So I decided to take a stab at blocking my own hat.
Sort of...
Going through my closet, I found this old cowboy hat that had roughly the right brim shape for I was trying to achieve (clearly I had bought it and some point for some random project and completely forgot about it. Thanks, past me!)


I thought about trying to stretch the crown out but didn't want to risk ruining the brim in the process.
So instead I bought a felt hat blank to experiment with.


But first I needed a block.
I had lucked out years ago and found a series of millinery blocks at an antique store in Canada.

It just needed a domed top. I thought about trying to make one from foam, but then lucked out AGAIN and found a fascinator block on Etsy with the exact right circumference for the tallest block.


Taped together, they make the perfect domed block!
So the felt blank is blocked and left to sit for a few days.


The final shape looks good! So I decide to cut the crown off of the cowboy hat and combine the two.

Not to bad looking!
At least from the side. The front, on the other hand, is....interesting.


The slight difference in sizes (the base is bit wider than the crown) creates weird tension and the crown bulges unattractively.
So, I decide to see if I can coax it into a nicer shape by stuffing it with tissue paper.


After leaving it for a few days (and spraying with a light stiffening sizing) the basic hat shape is done!

A black silk band it added, and the hat is complete!


Finally, I wasn't totally pleased with the way the ruff was sitting...mostly because the white chemisette is collarless and I forget to add a partlet underneath (which was my original intention).

So being too lazy to undress entirely, I tried wacking on a wire supportress just to see if that improved the silhouette at all.


And lastly, no reproduction of the Dunch portrait would be complete without a stand-in for a creepy Elizabethan child...

Aaaaaaaand it's done! (10 years later!)
Final thoughts: I'm really happy to have finally realized this outfit! It's a bit large and cumbersome, so I doubt I'll ever wear it to Faire...also it's so bizarre to modern sensibilities, but that's what I love about it.
(And I'm super proud of that stupid hat, even if it is a hodgepodge)
I think the overall look is really striking, but there are still a couple of things I could happily tweak.
For one thing, the gown is waaaaaay too long and could definitely stand to loose at least 2" from the bottom.
I also think I need a better way to secure the bottom of the chemisette/dickey (and might experiment a bit more with tucking it under the point of my pair of bodies).
Still, I'm chalking this one up to a success. It definitely has the overall feel that I was hoping to achieve.

***
Resources & Materials
Pattern:
-The Tudor Tailor (book)
Fabric:
Black wool from Mood Fabrics
-Black "Judy" linen (5.5oz) Gray Line Linen
-White linen (2.8oz) from WM Booth Draper
-Hemp muslin from Hemp Trader
Trim and Notions:
- Worsted black wool tape from WM Booth Draper
Thread:
-Black silk thread
-White cotton thread (silk finish) for linens
Other Supplies:
-Black wool felt hat blank from Amazon.
-Swedish pattern paper from Amazon. (This stuff is great! You can iron it!)
-Pattern weights