(NOTE: The bulk of this post was written in 2022 but it was not completed and published until two years later, so the timeline it describes might be a bit confusing)
***
Like so many of my other outfits, this project started out as something entirely different.
Well, not entirely...
I've been in love with these images of Bavarian camp followers since I first started down the rabbit hole of 16th c. costumes (now many years ago).
What can I say? I'm a sucker for ladies with weapons.
Throw in a big, stupid hat and I'm sold!
So of course that meant that this engraving quickly found its way onto my 'to do' list (read: the impossibly long queue of outfits which --in reality-- will never be finished).
But it wasn't until I found this image that a palette suddenly solidified in my head and I knew I had to make it!
Stammbuch Andreas von Schwerin
So up the queue it went. Designs were planned! Fabric purchased! Mockups started!
But as I started researching the outfit and looking at more images of German camp followers I came across this watercolour and simply could not get it out of my head.
Because, frankly, it was one of the most ridiculous images I had seen.
Amicorum Album of Nicolas Engelhardt 1573-1612
Look at it! It just screams Neapolitan Ice Cream (with a dash of pistachio for good measure).
And I love it. I mean, come on! There's a shoulder chicken! A SHOULDER CHICKEN.
All other plans were abandoned and I threw myself into the project at such an uncharacteristic pace that I didn't really document the process at all (partially because I was trying to get in under the wire for the the closing weekend of the 2022 SoCal Renaissance Faire season)
From start to finish the whole thing took about 3 months, which for me is ridiculously quick.
Regardless, I'll go the through the process as best I can....
But first, I had to figure out what it was I was looking at.
It's a tricky prospect at the best of times when one is dealing with oil paintings and etchings...but a rough watercolour? This made things considerably more difficult.
For example, what are going on with her sleeves? Are we looking at her smock or something else entirely?
My first thought was "Yes, obviously those are her under-sleeves." But it's a question worth examining, as it's not as straightforward as it seems.
Firstly, while this fashion for poofy white sleeves seems to be a very German look, you do also see sheer over-sleeves in other countries. However, they are often half length and/or clearly worn over close-fitting sleeves.
Unknown Lady, 1566 (Neatherlands) & Mary Hill 1560s (England)
In contrast, the German version really goes in for full-length, highly gathered and voluminous sleeves.
But again, are these visible smock sleeves or separate over-sleeves?
Some images are very obviously made of a silk or patterned fabric, so very strongly indicating an over-sleeve.
While others incorporate blackwork or even insertion lace, suggesting a visible linen smock.
Now, the argument has been made that women never EVER —under any circumstances!— displayed their undershirts, and therefore these must be something else.
I have to admit that this doesn't hold water for me and seems to be one of those costuming 'rules' that doesn't really bear close scrutiny.
Many genre paintings of working women are shown in their shirt sleeves and even bare arms.
And camp followers are also shown in similar states of undress.
"Sacking of Wommelgen" (detail) Vrancx, 1630
But really what clinched it for me was "Die Hausbücher der Nürnberger" which depicted a series of illustrations of German working people, including many of women who appear to be wearing this style (with sleeves worn both down and rolled up, which to me indicates these are not too separate sleeves)
So in the end, while I suspect that not ALL of the German images show under-sleeves (and quite a few definitely don't) the camp follower is --in all probability-- shown in her shirt sleeves.
And even is she's not, she's wearing a fashion that's clearly intended to mimic an exposed shirt and when it comes to dressing for California heat that basically amounts to the same thing...
So no over sleeves for me!
(Okay, I know that was a very protracted and roundabout way to come back to where I started in the first place...but I like to have a reason behind what I do, even in that reasoning is somewhat motivated)
Next question...and this one is a little trickier:
What is going on at the bottom of this doublet?
There appears to be a slight point and a thick black line running around the bottom of the bodice. What is this meant to represent?
Is it a line of trim? A belt? Or just a particularly heavy handed outline?
I rejected the belt idea pretty quickly, reasoning that she was already wearing one belt (to bustle up her skirts) and it looked to come to too much of a point to be anything other than part of the doublet. But what?
I can't recall ever having seen trim placed along the bottom edge of a bodice of any sort, unless it was on tabs or 'skirts'.
I thought it perhaps it was a feature unique to German fashion (which until now I was relatively unfamiliar with) but despite looking I couldn't find anything similar.
I did however, find this image.
Another watercolour, also German (again from "Die Hausbücher der Nürnberger")
For my money, it appears to show a woman in a long sleeved waistcoat or doublet, with a seam at the waist and a narrow bodice 'skirt'. The bottom of the skirt appears to have a darker, denser line which can be interpreted as trim (to match the trim on the cuffs and center front).
So I decide to opt for something similar and plan to make a narrow peplum/skirt, but pointed, to match the shape of the doublet.
I don't know if it's right, but it seemed better than trimming the bottom of the doublet.
So with that, I jump into construction...
First, I purchased the fabric for the skirt (the most bubblegum pink wool I can find!) and see if anything from my stash works for the rest.
I think light green wool is probably a slightly better match to the watercolor, but in the end opt for a punchier green linen (though I still might swap it out for the wool later).
Next, it's time to start on the doublet.
This is definitely the most labour intensive piece of the outfit. However, the fact that it was sleeveless and didn't close with buttons meant I wouldn’t have to deal with the trickiest aspects of a tailored garment and therefore could get something made relatively quickly.
It's based on pattern I've used before: a mustard brown doublet based on the Modern Maker proportional bara method. The only difference will be to the doublet skirts.
I didn't have the time to document the whole construction process, but the writeup for above doublet can be found
HERE and
HERE)
This doublet started the same way.
First a mockup (with narrow peplum) is made to see how it fits over the skirt.
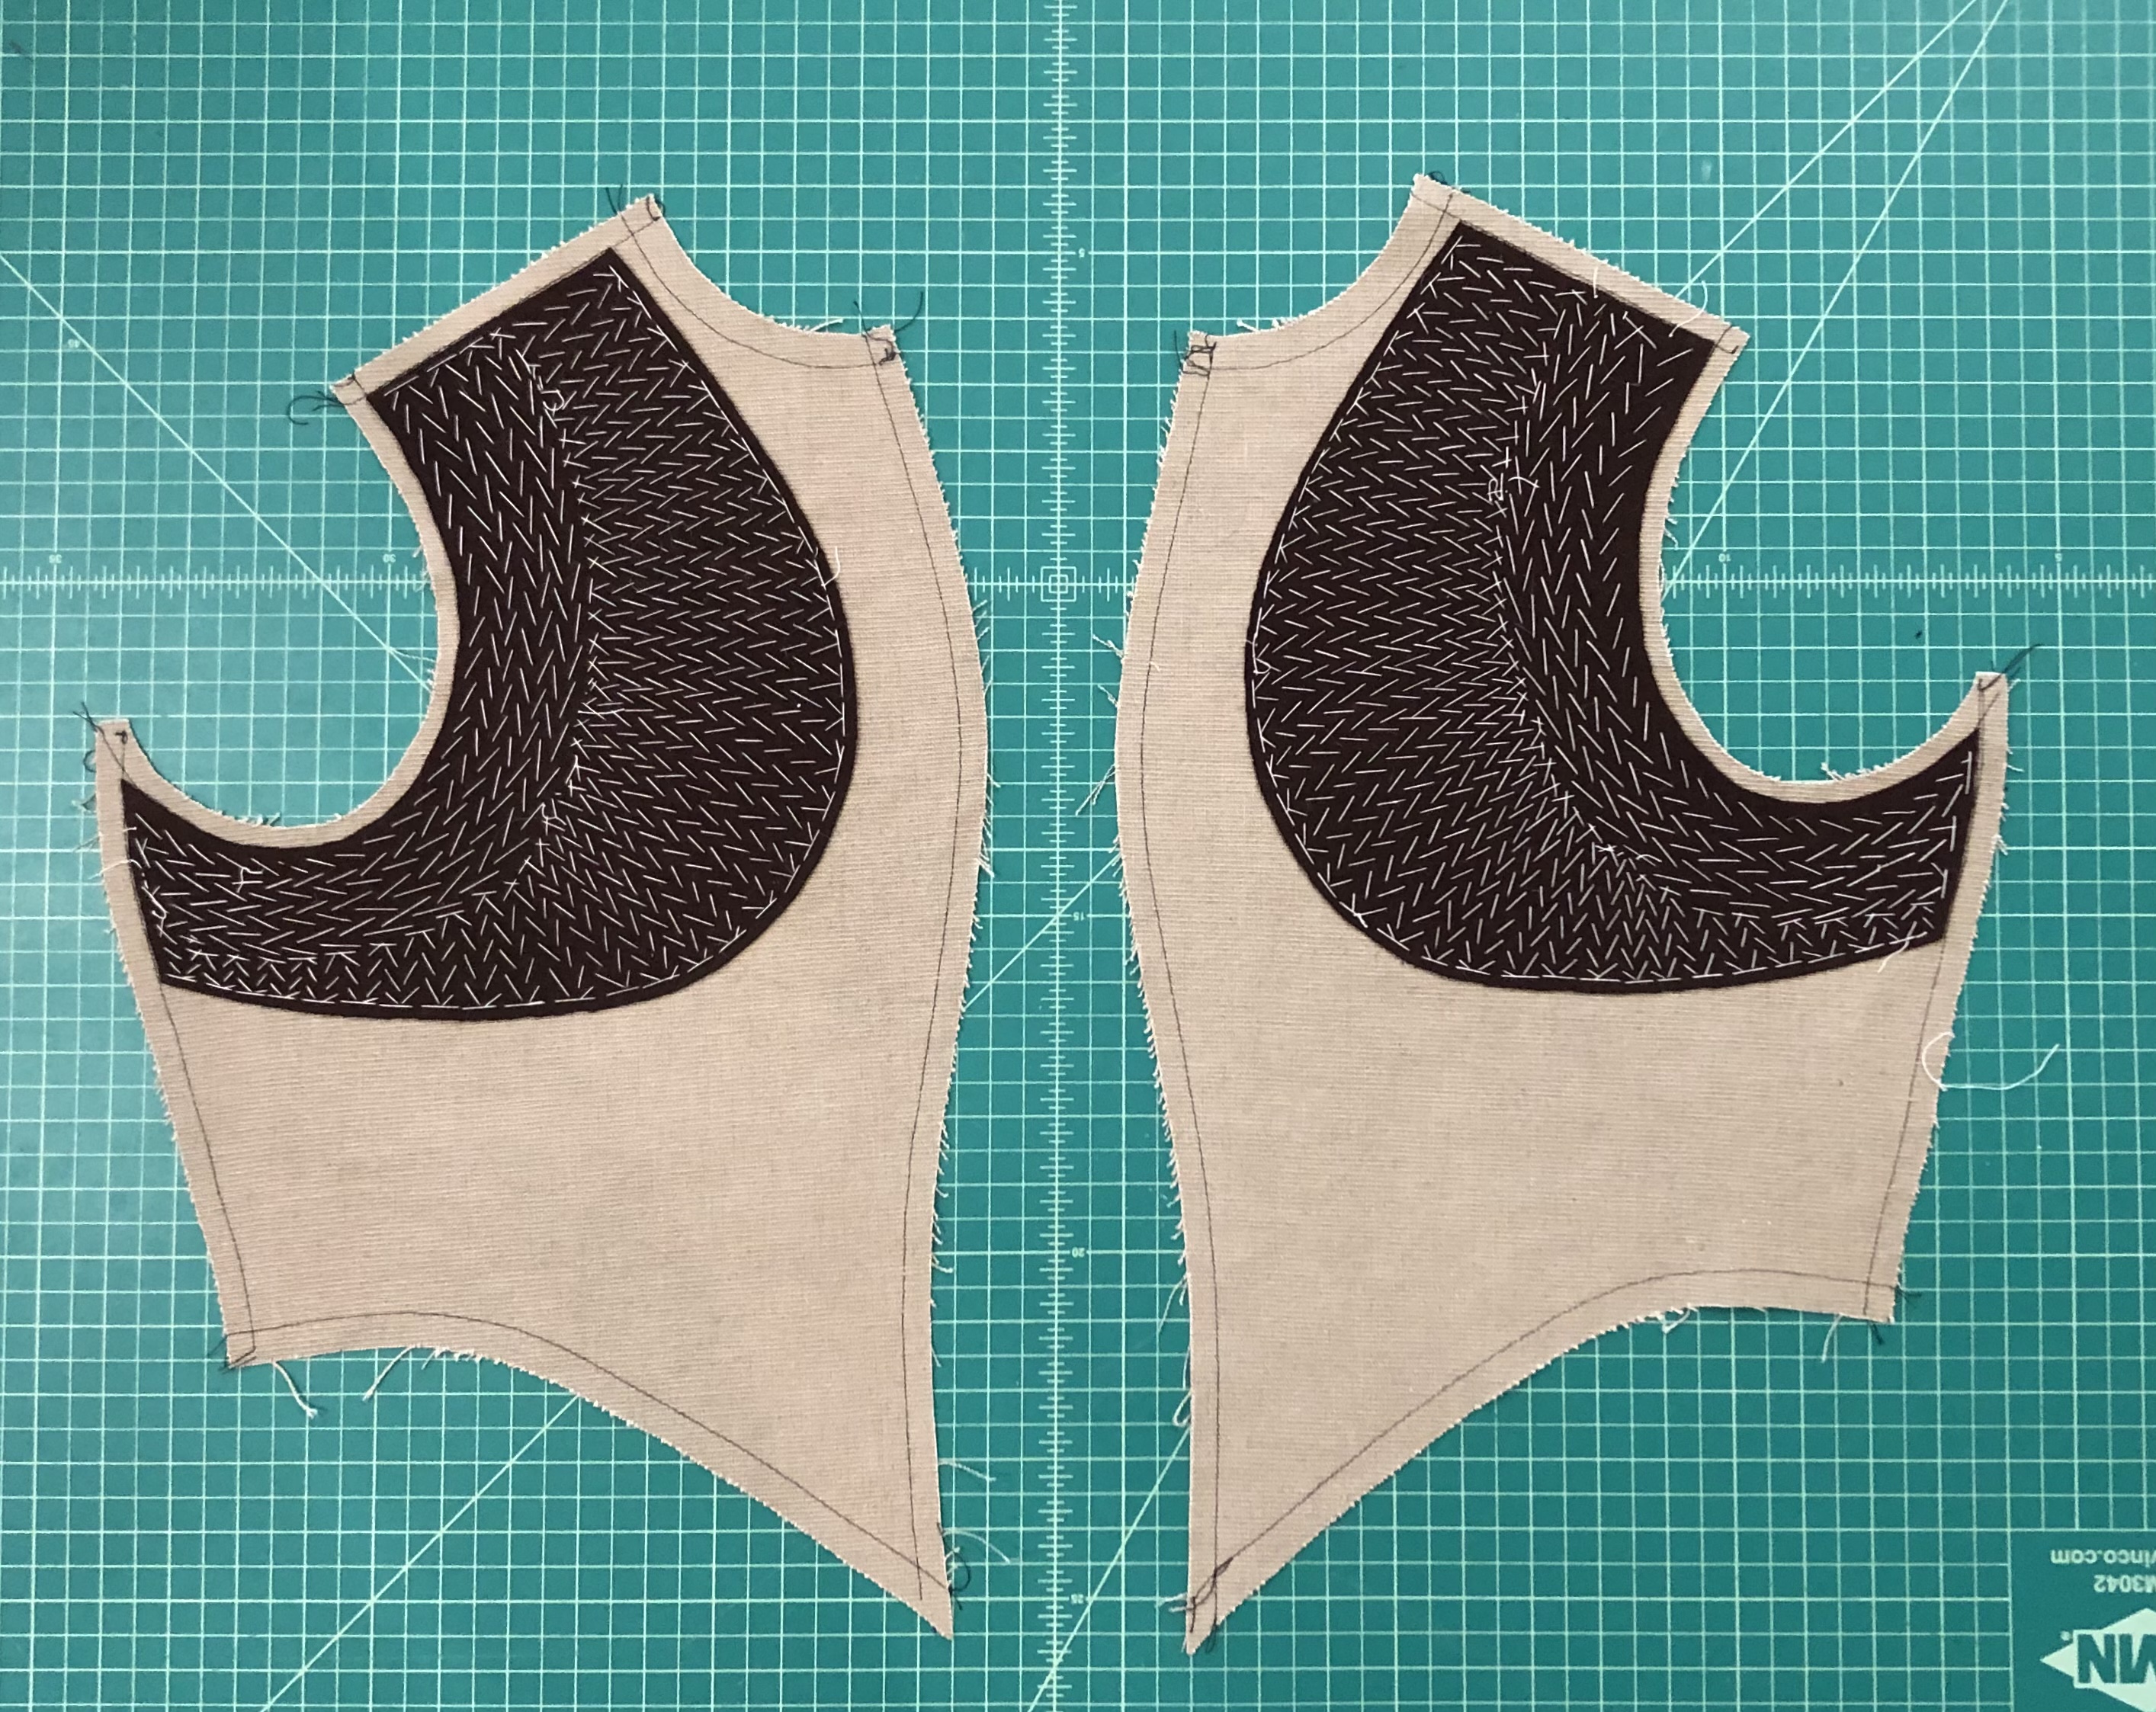
Then the foundation layers are cut in linen, with wool flannel pad-stitched in to support the garment.
Then, jumping waaaaaaay ahead...the foundation is basted the the outer layers, the side seams are joined and a linen lining sewn in.
(I promise things are more clearly illustrated in my older posts!)
Next, it's time to decide how to apply the trim.
I have two options: To trim the body and the skirt separately, or to run a single line of trim all the way around the doublet.
I opt for the later for aesthetic reasons, even though it's probably way more complicated than need be.
So with that, the 'skirts' are attached, the trim is sewn on and the doublet is done!
Well, nearly...
I still have add closures in the form of hooks and eyes.
But I've run out of time!
If I want to wear the outfit to Faire I'll have to wear it open....which is what I do.

And I think it looks rather jaunty!
I didn't end up taking many photos until we back in the parking lot getting ready to leave.
The lighting was just too good not to take advantage of and (surprisingly) my phone did a pretty great job at capturing the insanely glow-y sunset colours.
I mean, yes, the outfit is fun...but it's really all about the light!
And the grass and background actually mimic the original watercolour quite well.
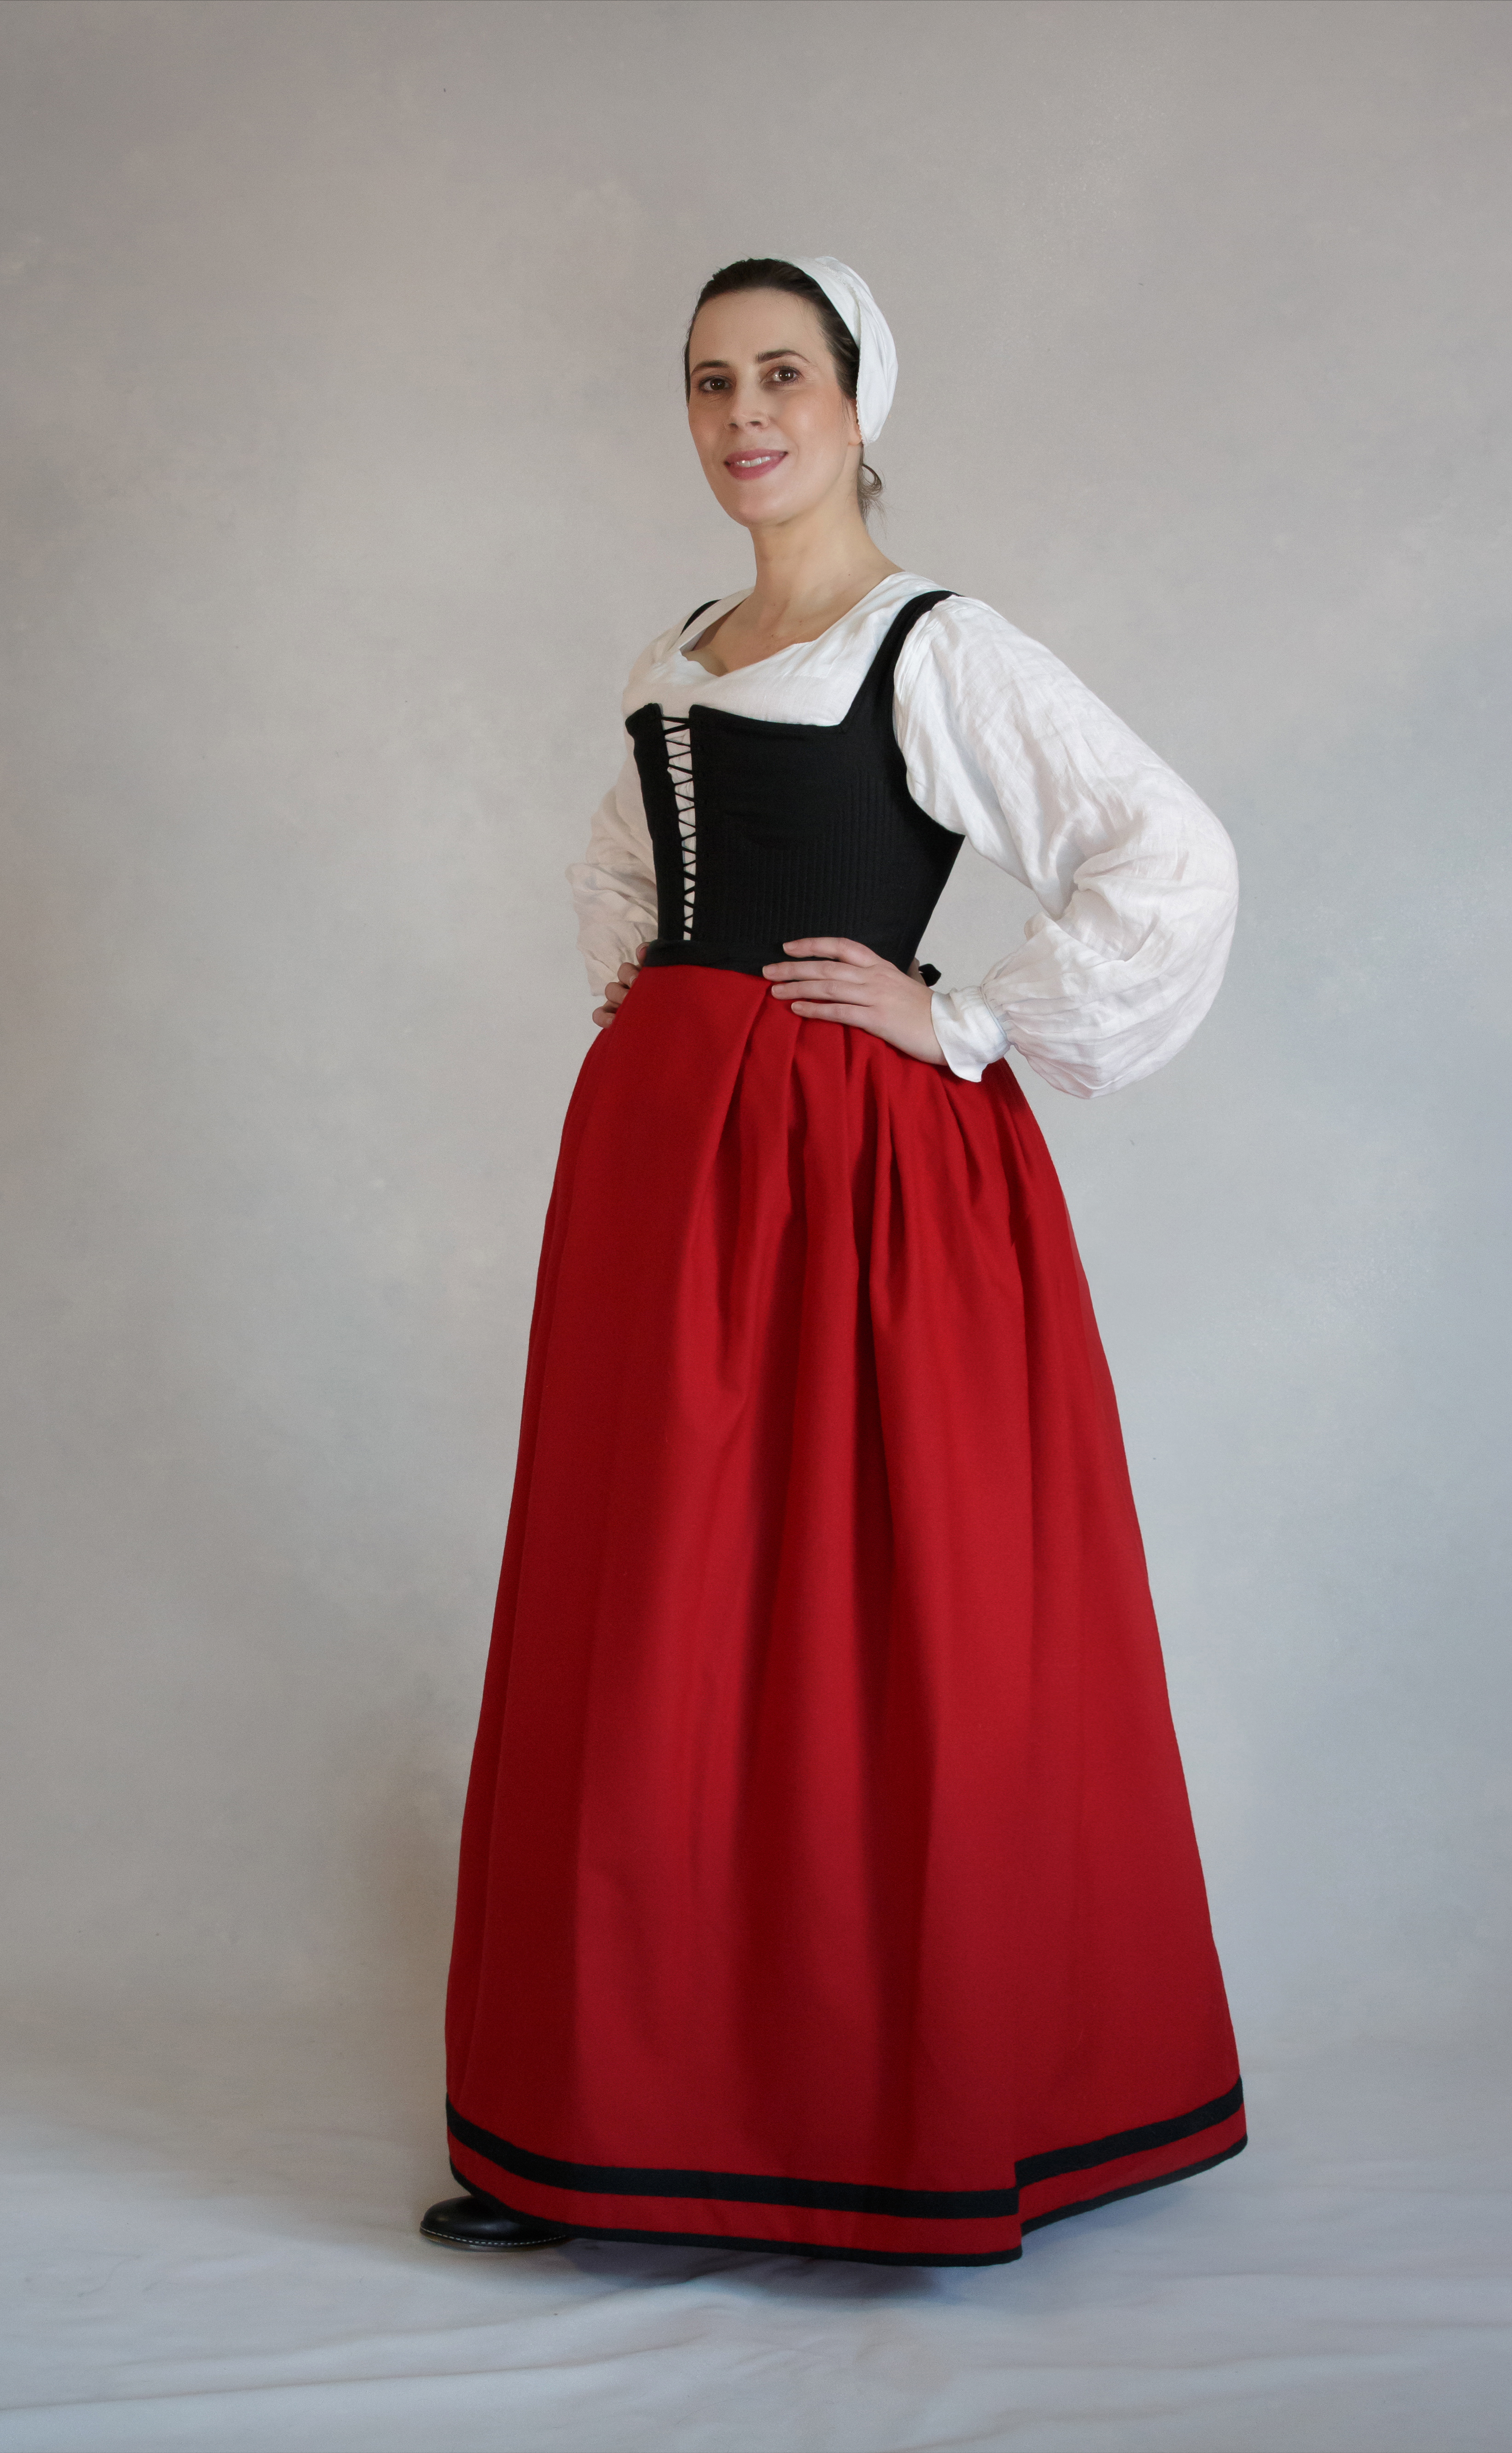
As you can see, by this point I'd clearly already finished most of the outfit and accessories, which now includes:
A pair of new linen bodies that I finished back in early 2022 (using the same pattern as my
black bodies, but cut lower in the bust and with a curved edge going into the shoulder strap, rather than a right angle).
A high-necked linen smock, with ruffles at the neck and cuffs.
(Note: The watercolour appears to have a figure 8 ruffs and cuffs, but I didn't have the small wrist ruffs completed yet, so I used my old smock)
A pink petticoat with green linen guards. Like most of my other petticoats it's made of two pieces of 60" fabric, joined along the selvaged edges (bringing the total circumference to just under 120") and cartridge pleated to a waistband. There are 3 bands of 1.5" green linen trim.
The only real differnce is that this time it closes with ties and eyelets rather than hooks and eyes. Not sure that I like that method better, but there you are...
Next, a white gathered apron. It's basically a white linen rectangle, aprox 38x26", gathered down to 8" at the waist.
A white coif with narrow lace....
...over which is worn a vintage Austrian hat, trimmed with several antique black millinery feathers.
I'm very pleased with how the hat turned out. The old wool cap was battered and dented in just the right way to match the inspiration image and I was so pleased to find some lovely wispy feathers as well.
However, the shape and curves of the hat dictated the placement of the feathers, which in turn is what let to the whole outfit being constructed as a mirror image to the original (usually I'm pretty finicky about trying to make as close to a direct one-to-one as possible, but what can you do?).
Moving on...next is a 3/4" black leather belt to bustle the skirt up.
Hanging from the belt a knife in a black leather sheath and a small leather purse.
(Though the knife is left out of the sheath for Faire, obviously)
That's it for my Faire outing, but a few more accessories are needed to complete the look before the final photoshoot.
Jumping forward 2 years, the newly completed/assembled pieces include:
My small ruff.
A new set of small, narrowly set wrist ruffs.
(which means the ruffled smock is switched out for my collarless smock)
A spear with white tassels
A small, antique black brush with white horse hair bristles.
A roll of black wool to fake a mantlesack.
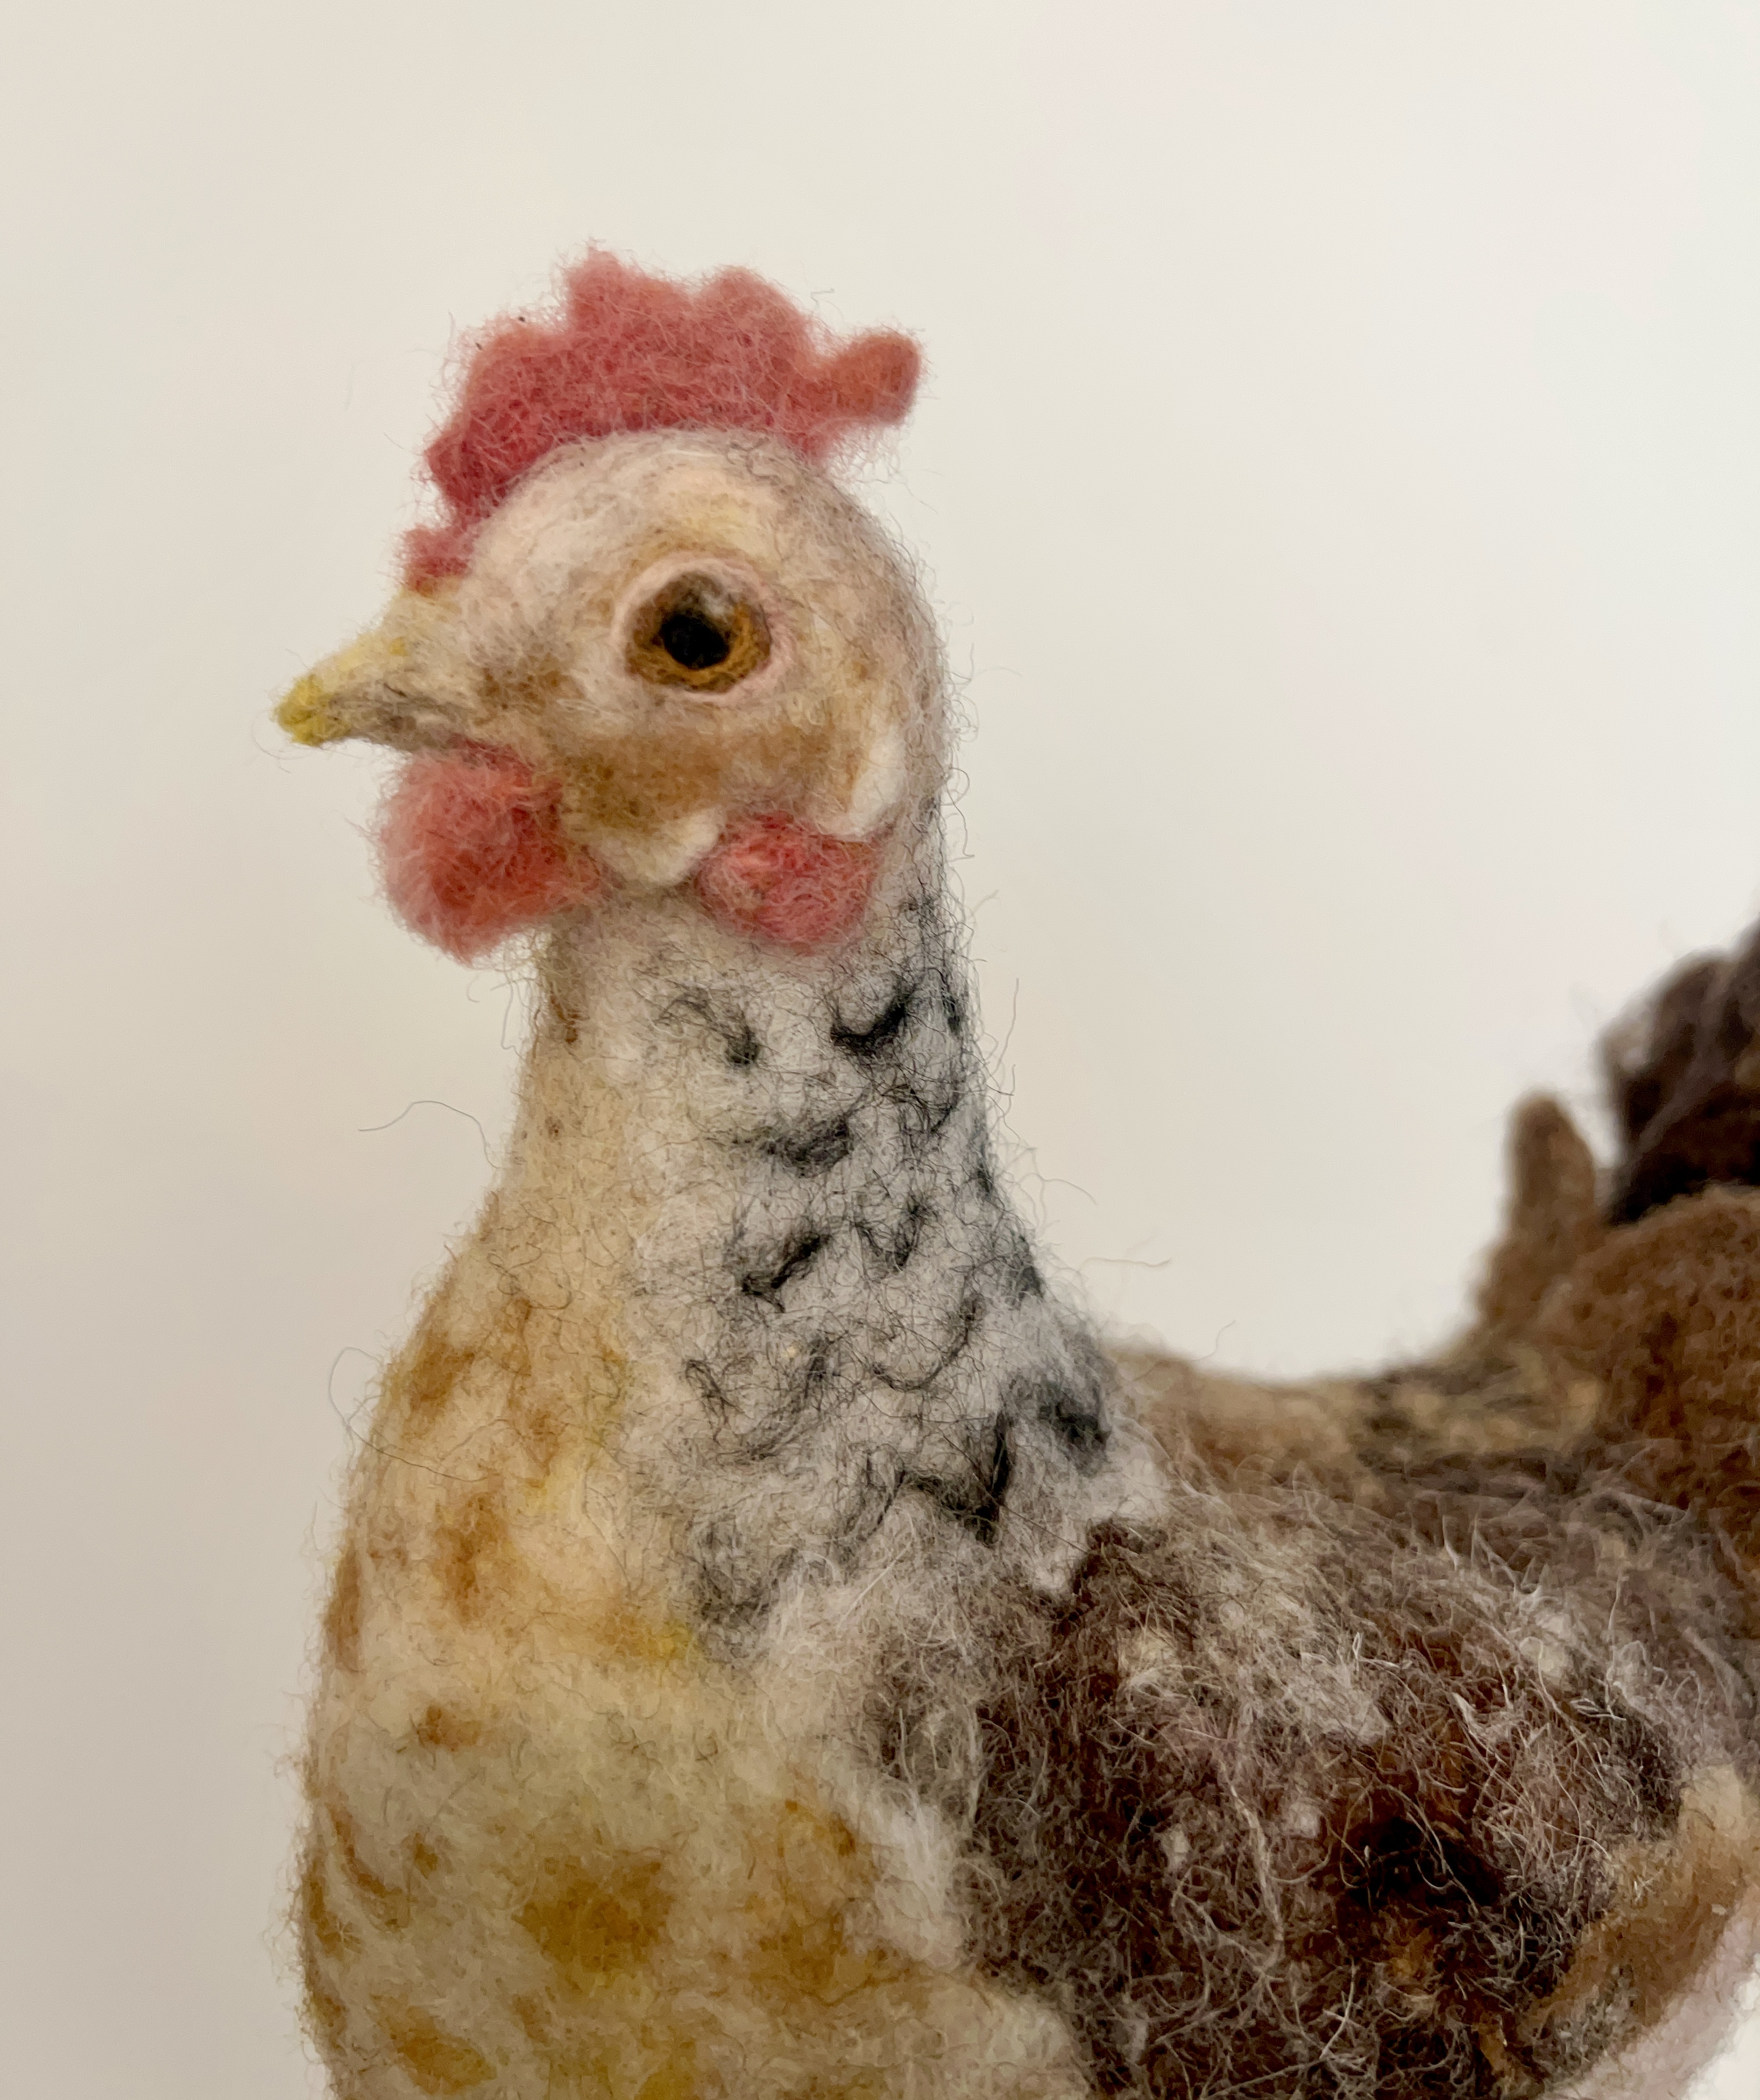
And lastly, a small felt chicken.
And I'm not going to lie...the chicken is definitely the BEST part of this whole outfit!
All the credit goes to
ArtFeltFibres on Etsy. I requested a custom Welbar hen (a breed which matched the colouring from the original image) and she completely knocked it out of the park!
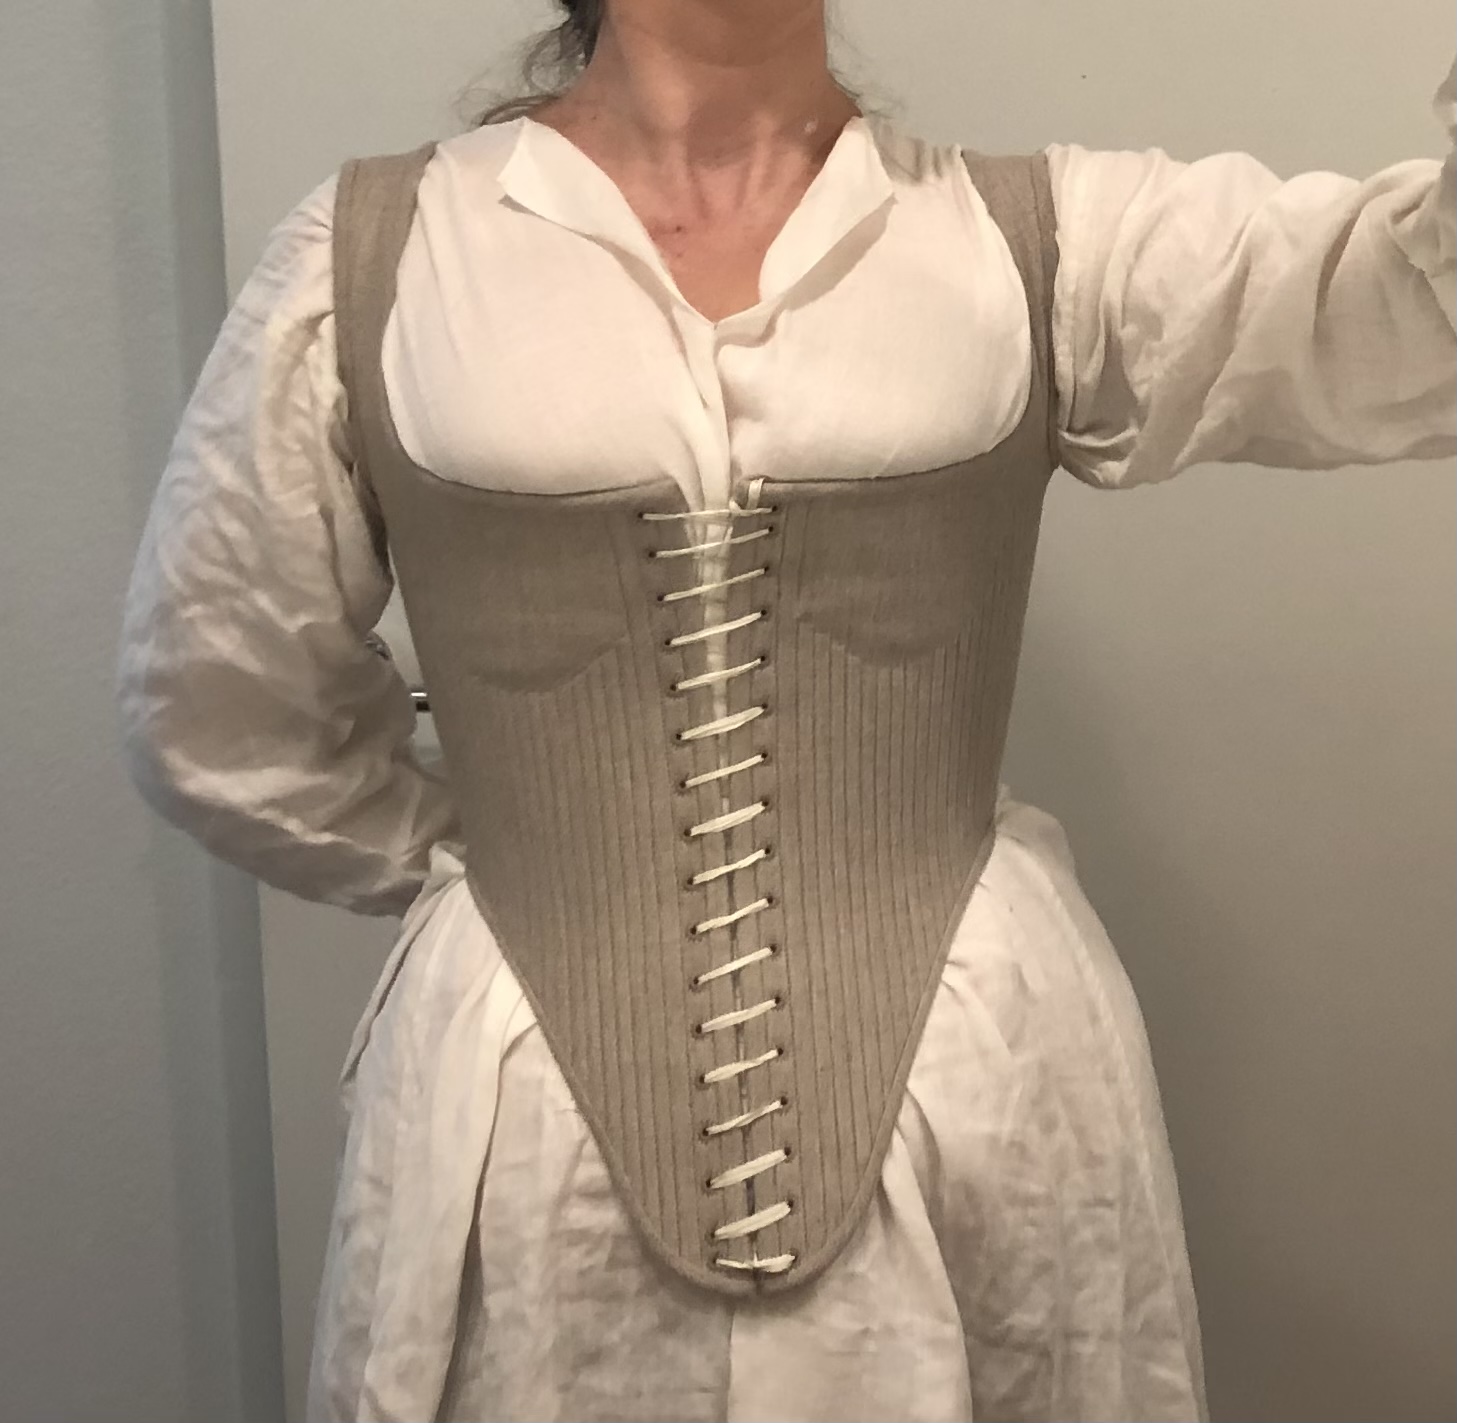
Finally, the closures are added to the doublet (and as usual, I cheat using hook and eye tape)
(NOTE: this is being worn with my black corset, so you can see the
bust-line is much higher and flatter compared to the images below)
And that's it!
The ridiculous Ice Cream Sundae outfit is done!
And a few without the other accessories.
I love this outfit to bits.
It's just so fun.
I definitely plan to return to the camp follower aesthetic and to other German looks in the future.
***
Resources & Materials
Accessories:
Pattern:
Fabric:
Trim and Notions:
Thread:
-Black silk thread
-Pink silk thread
-Green cotton thread
-White cotton thread (silk finish)
-White linen thread